Discord Ticket Setup
Please note: you can only connect one Discord server to each Mava dashboard.
Connect Mava to your Discord
Step 1: Create a new integration
Within the Mava Dashboard go to the integrations page
Create a new 'Discord' integration
Step 2: Add Mava to your Discord Server
Select which server you want to add Mava to from the dropdown
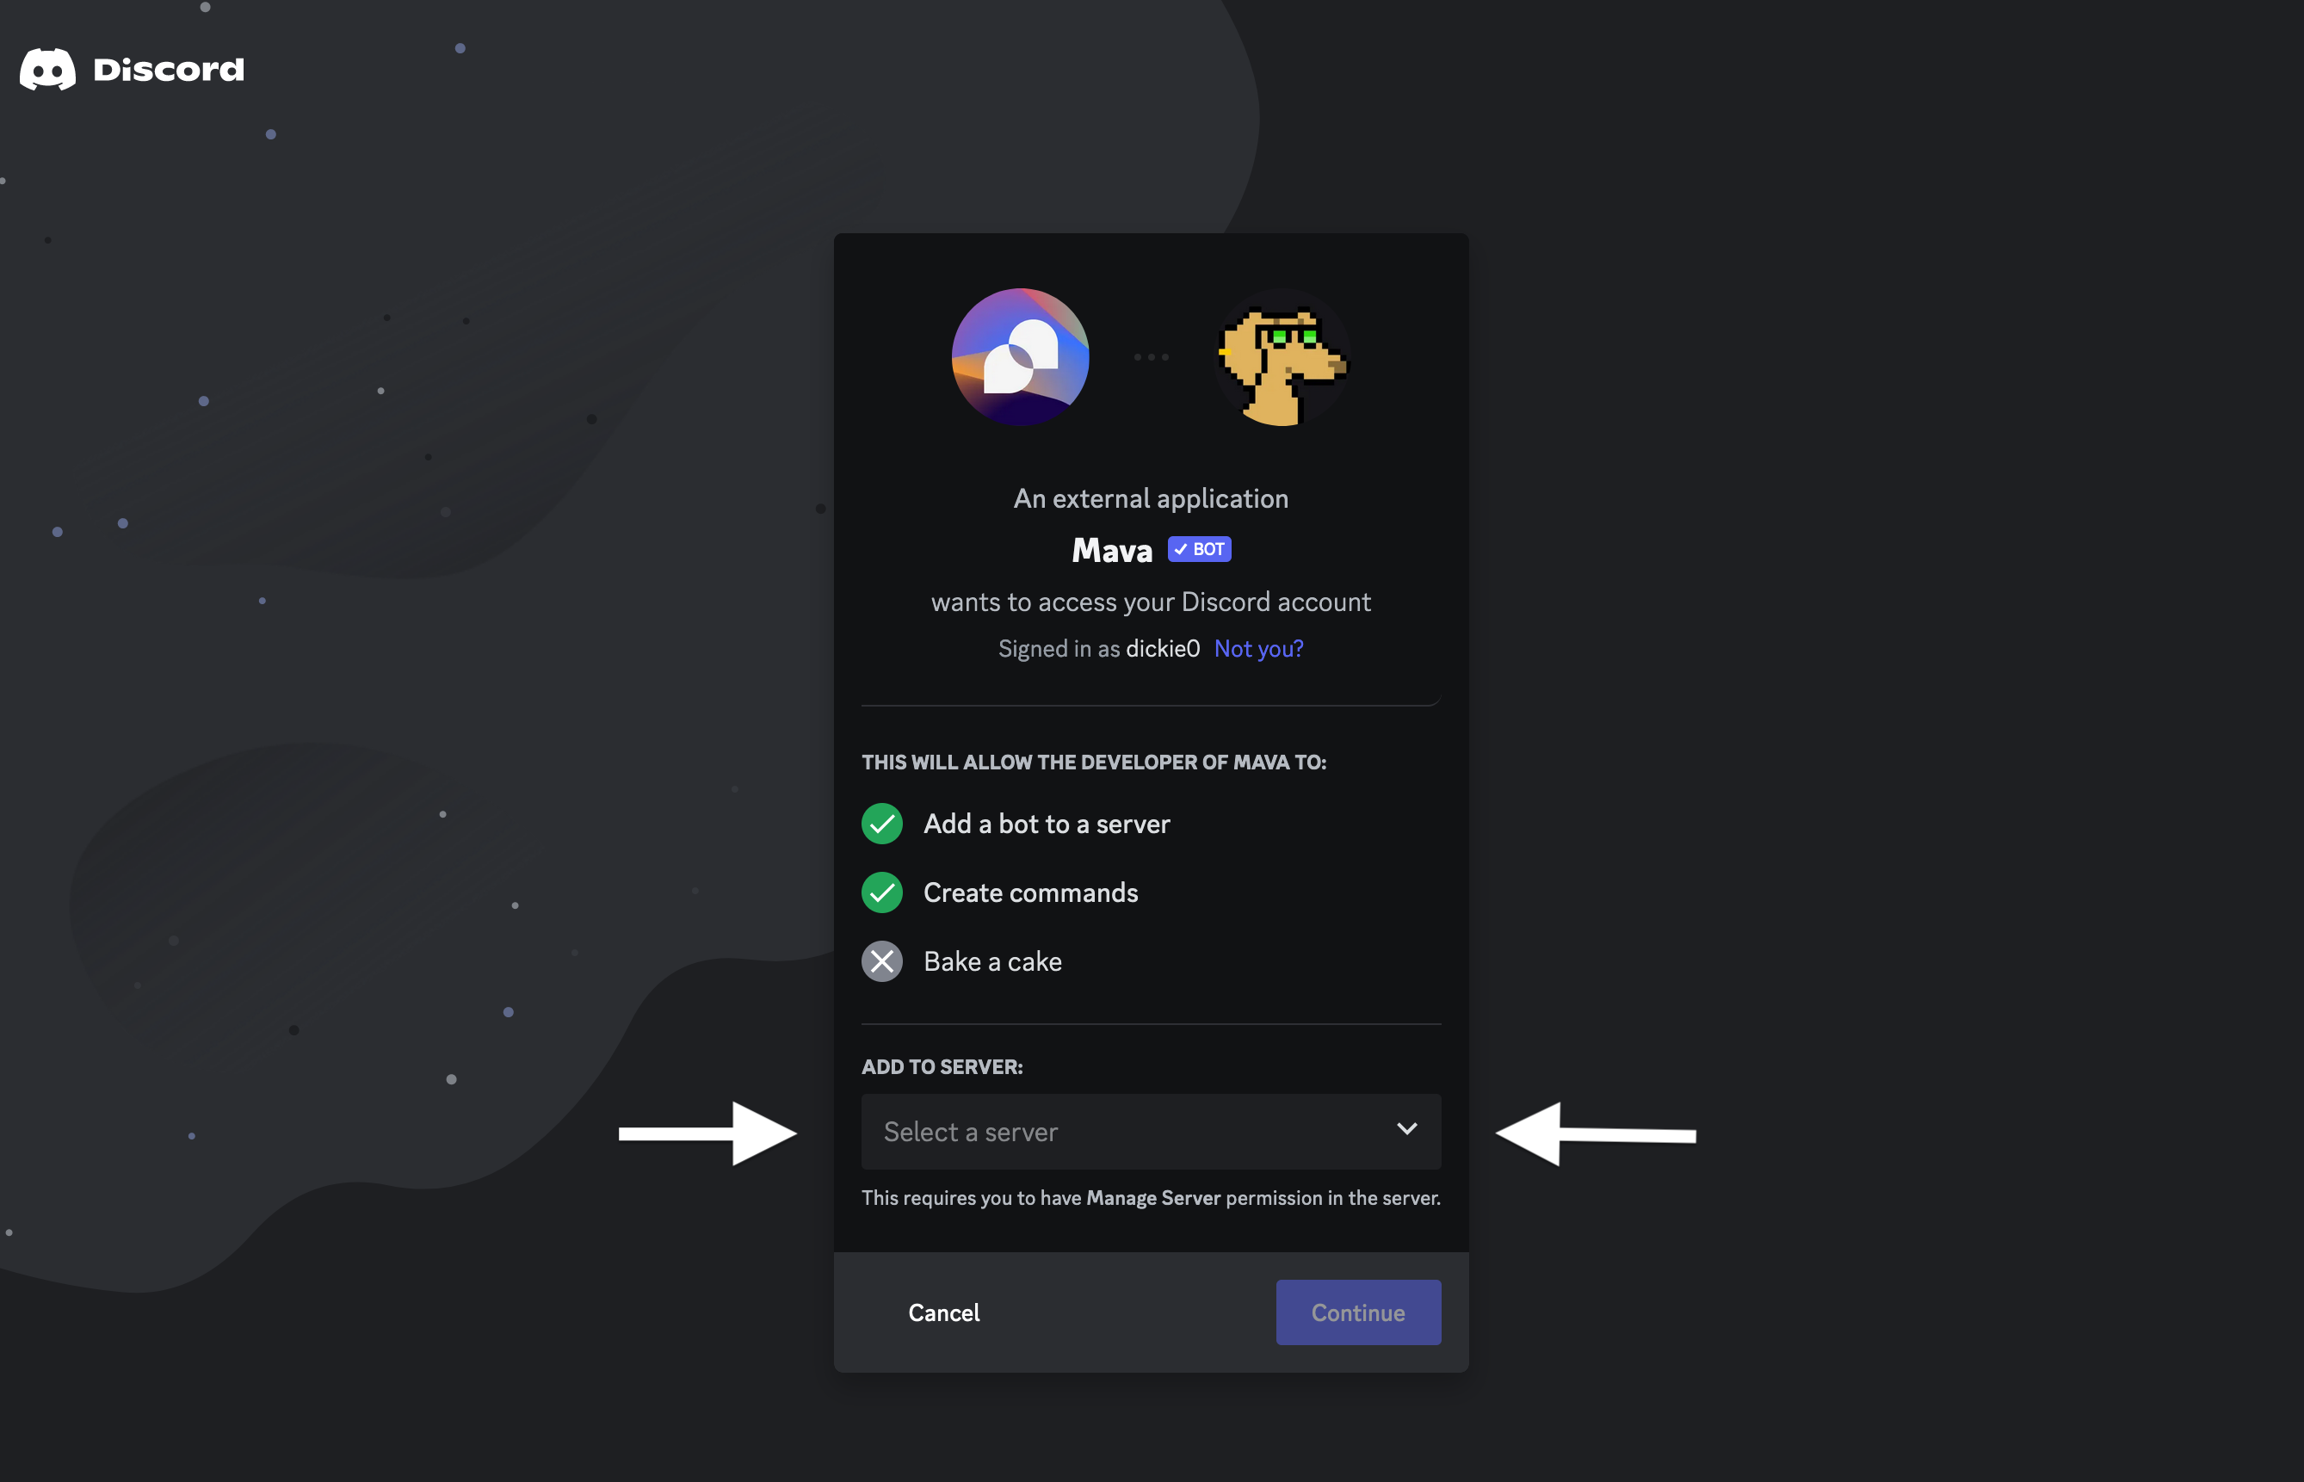
Authorize Mava to join your server (Mava doesn't require admin permissions like most bots, but we do require the permissions listed in the screenshot below to ensure the bot functions properly).
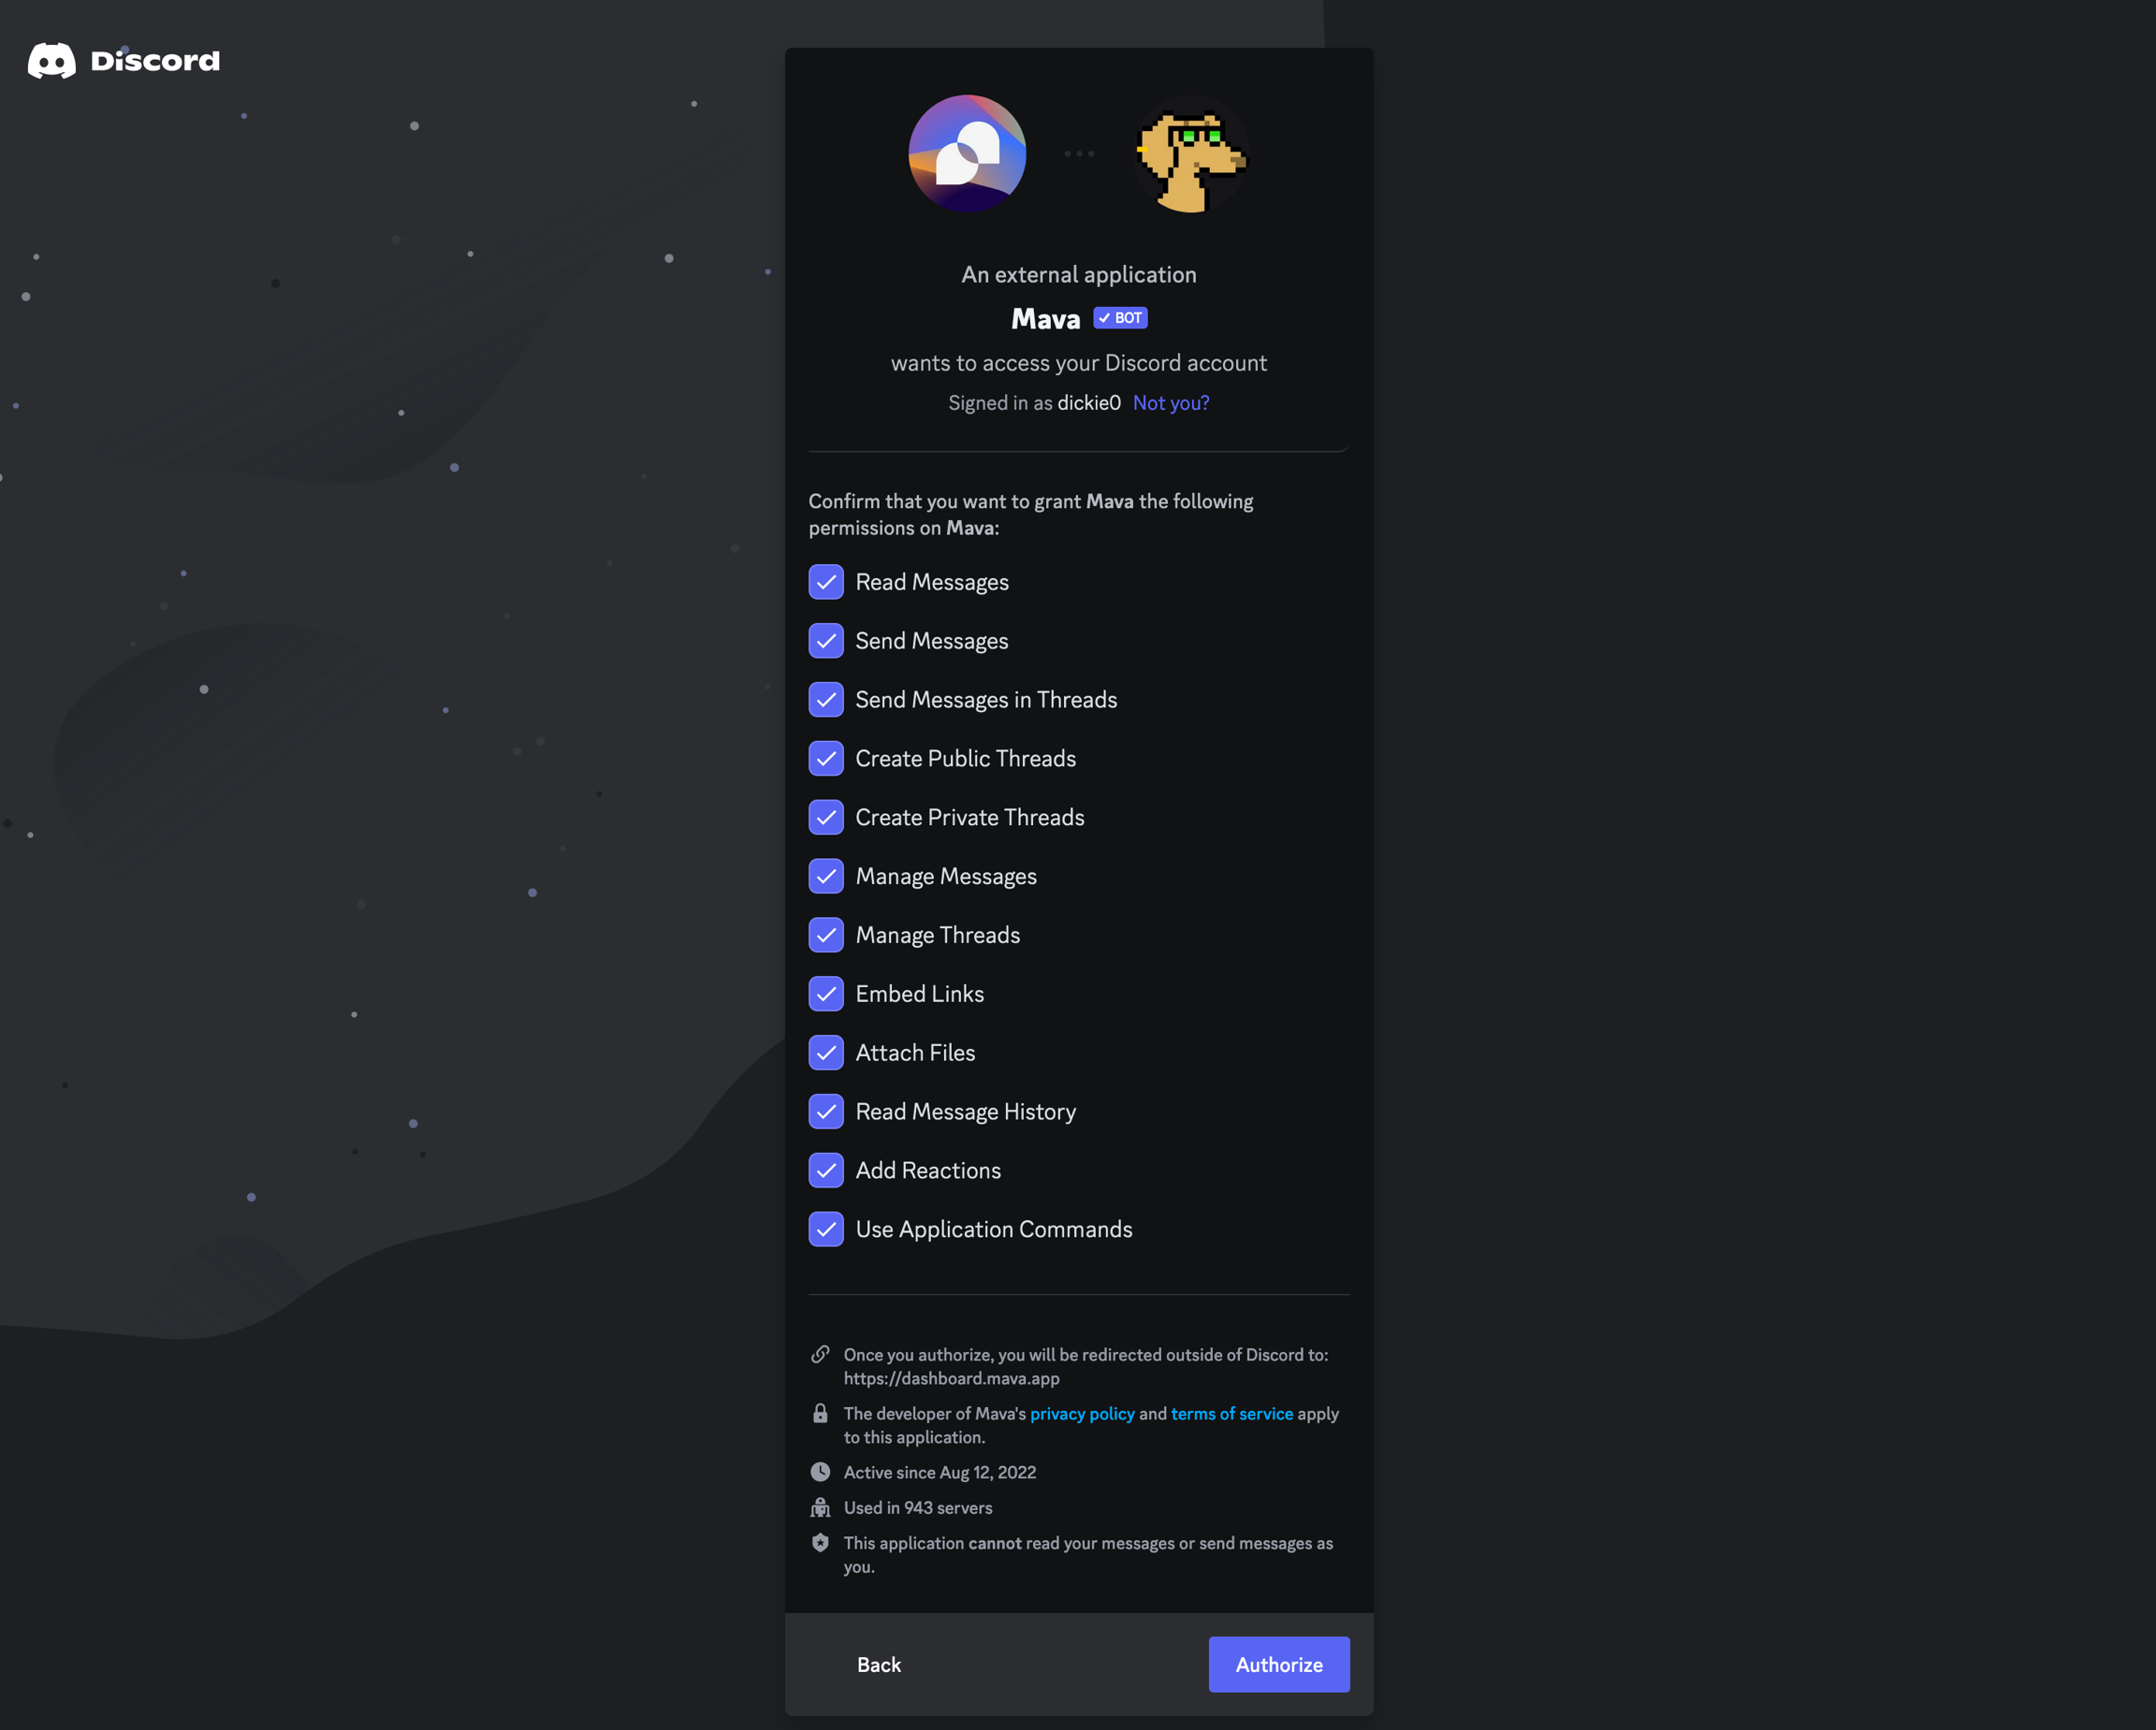
Step 3: Select the Discord channel
Tip: We recommend creating a new channel within your Discord called e.g. '🎟️- Support-Tickets' or '🆘-Open-Ticket'. This channel can be private if you just want to test the bot out. We recommend this channel is ONLY used for support tickets and that non-admin users are not given permission to write in the main channel. This ensures that the only action users can take is to press the 'Create Ticket' button making the support process very clear.
Find your existing ticket channel or the new one you just created from the dropdown.
After selecting which Discord channel you want the Mava bot in, you might receive an error message like the one below. Move onto the next step to set the correct permissions.
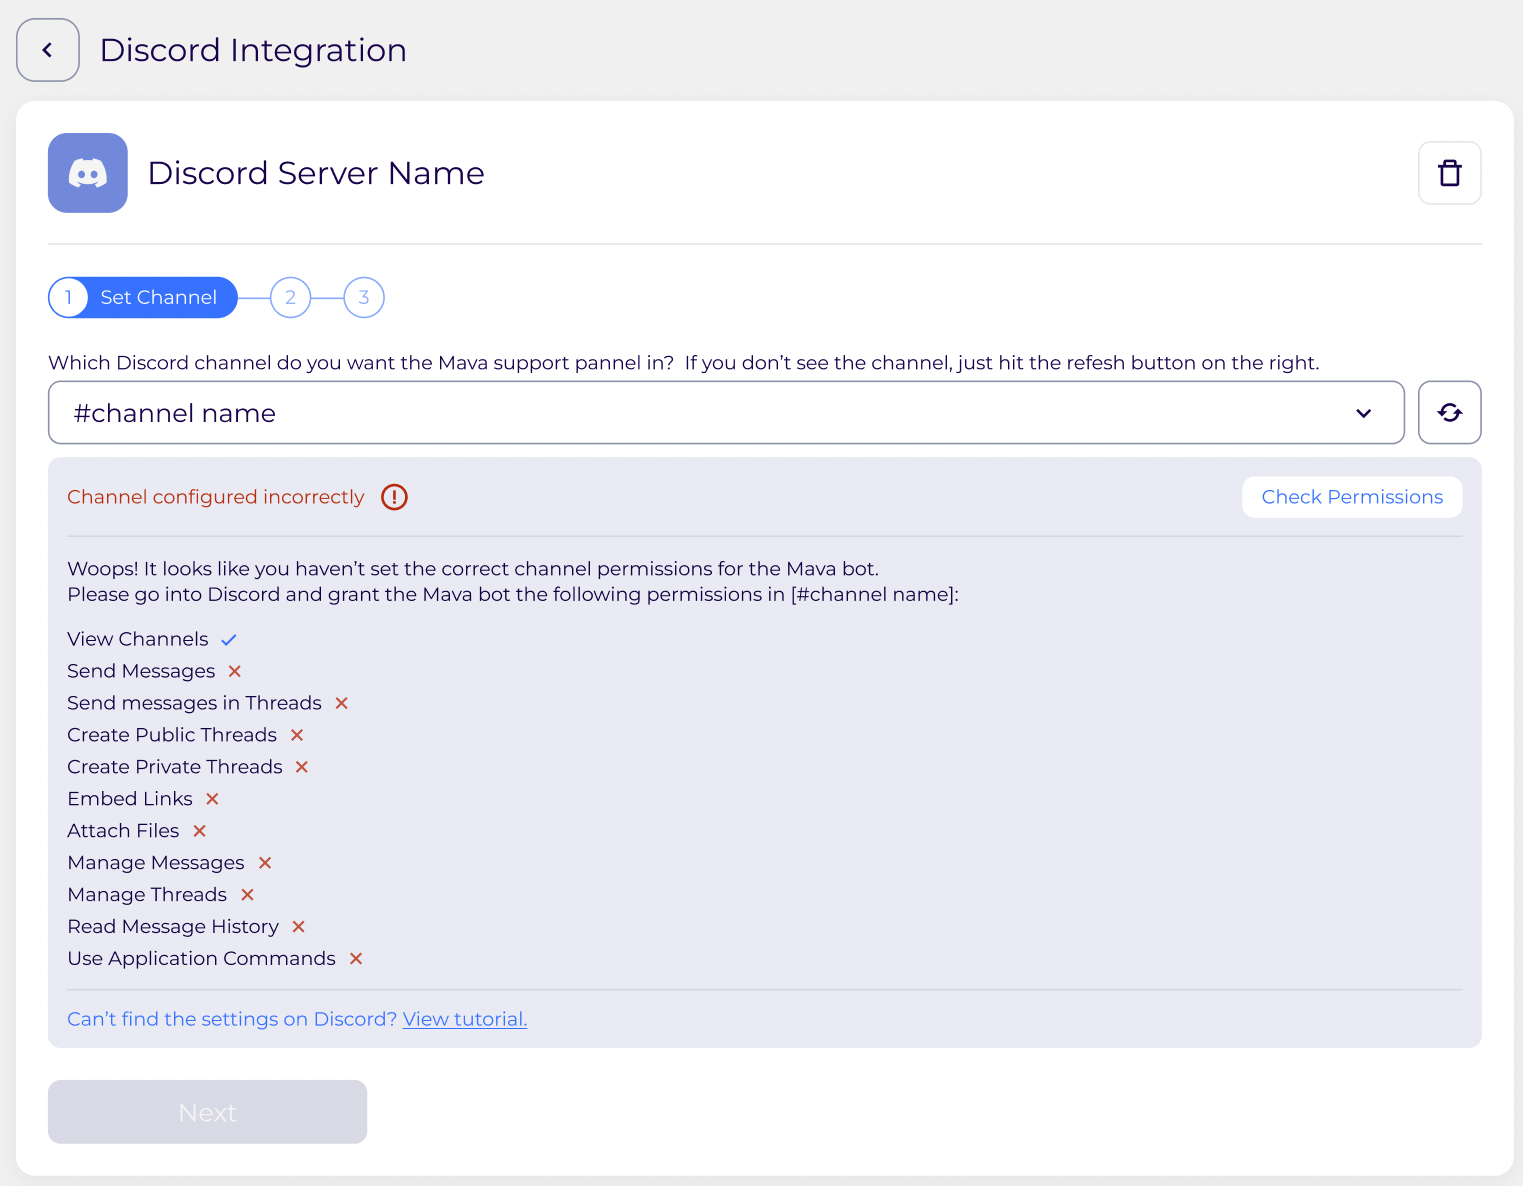
Step 4: Set the correct Discord channel permissions
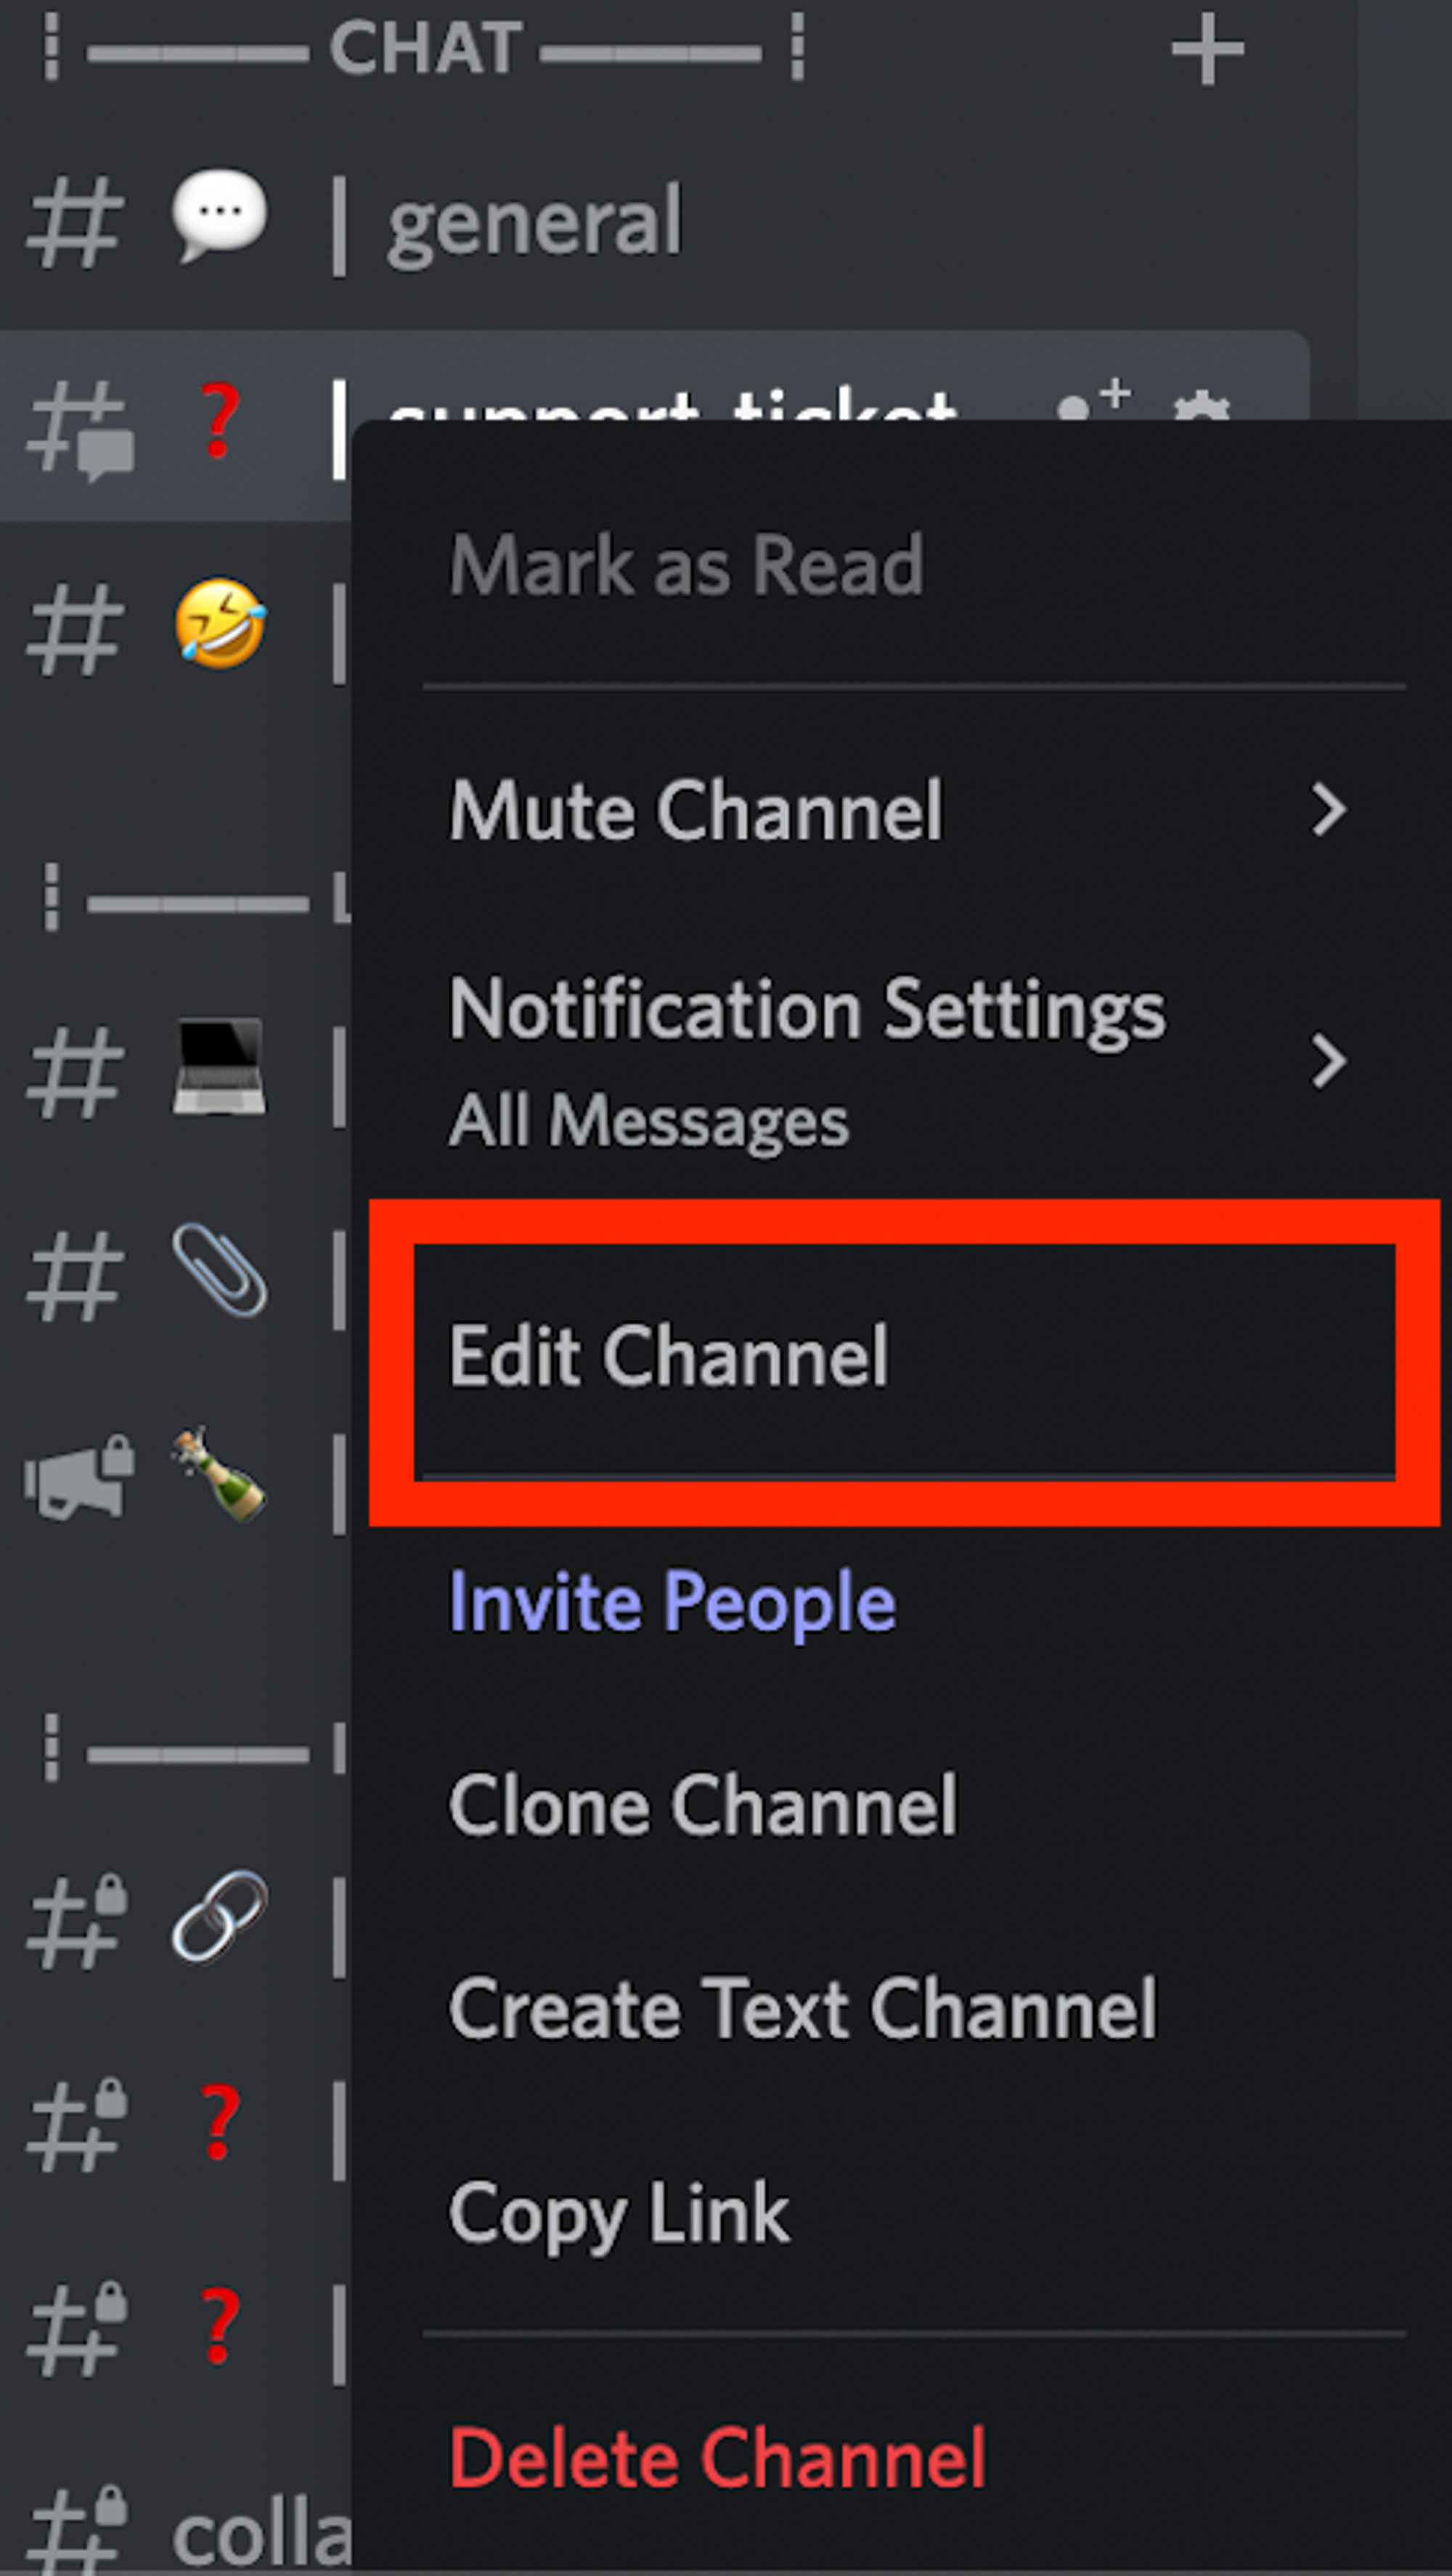
Open your Discord server and find the channel you added Mava to from the left hand channel list. In this example we are adding the Mava bot to a channel called ‘support-ticket’
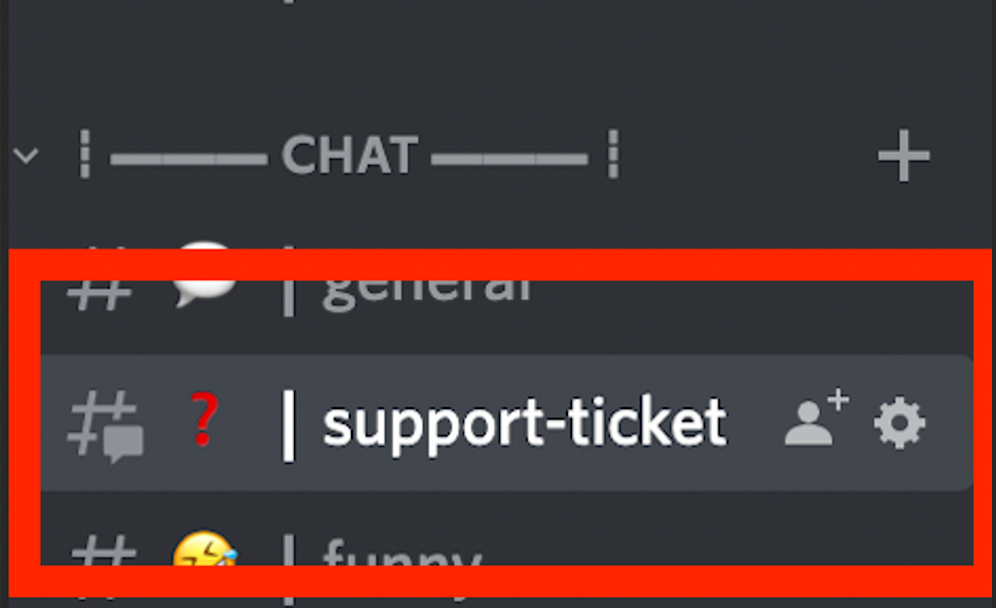
Right click on that channel (’support-ticket’ in our example) and select ‘Edit Channel’
Select the ‘Permissions’ option from the top left menu.
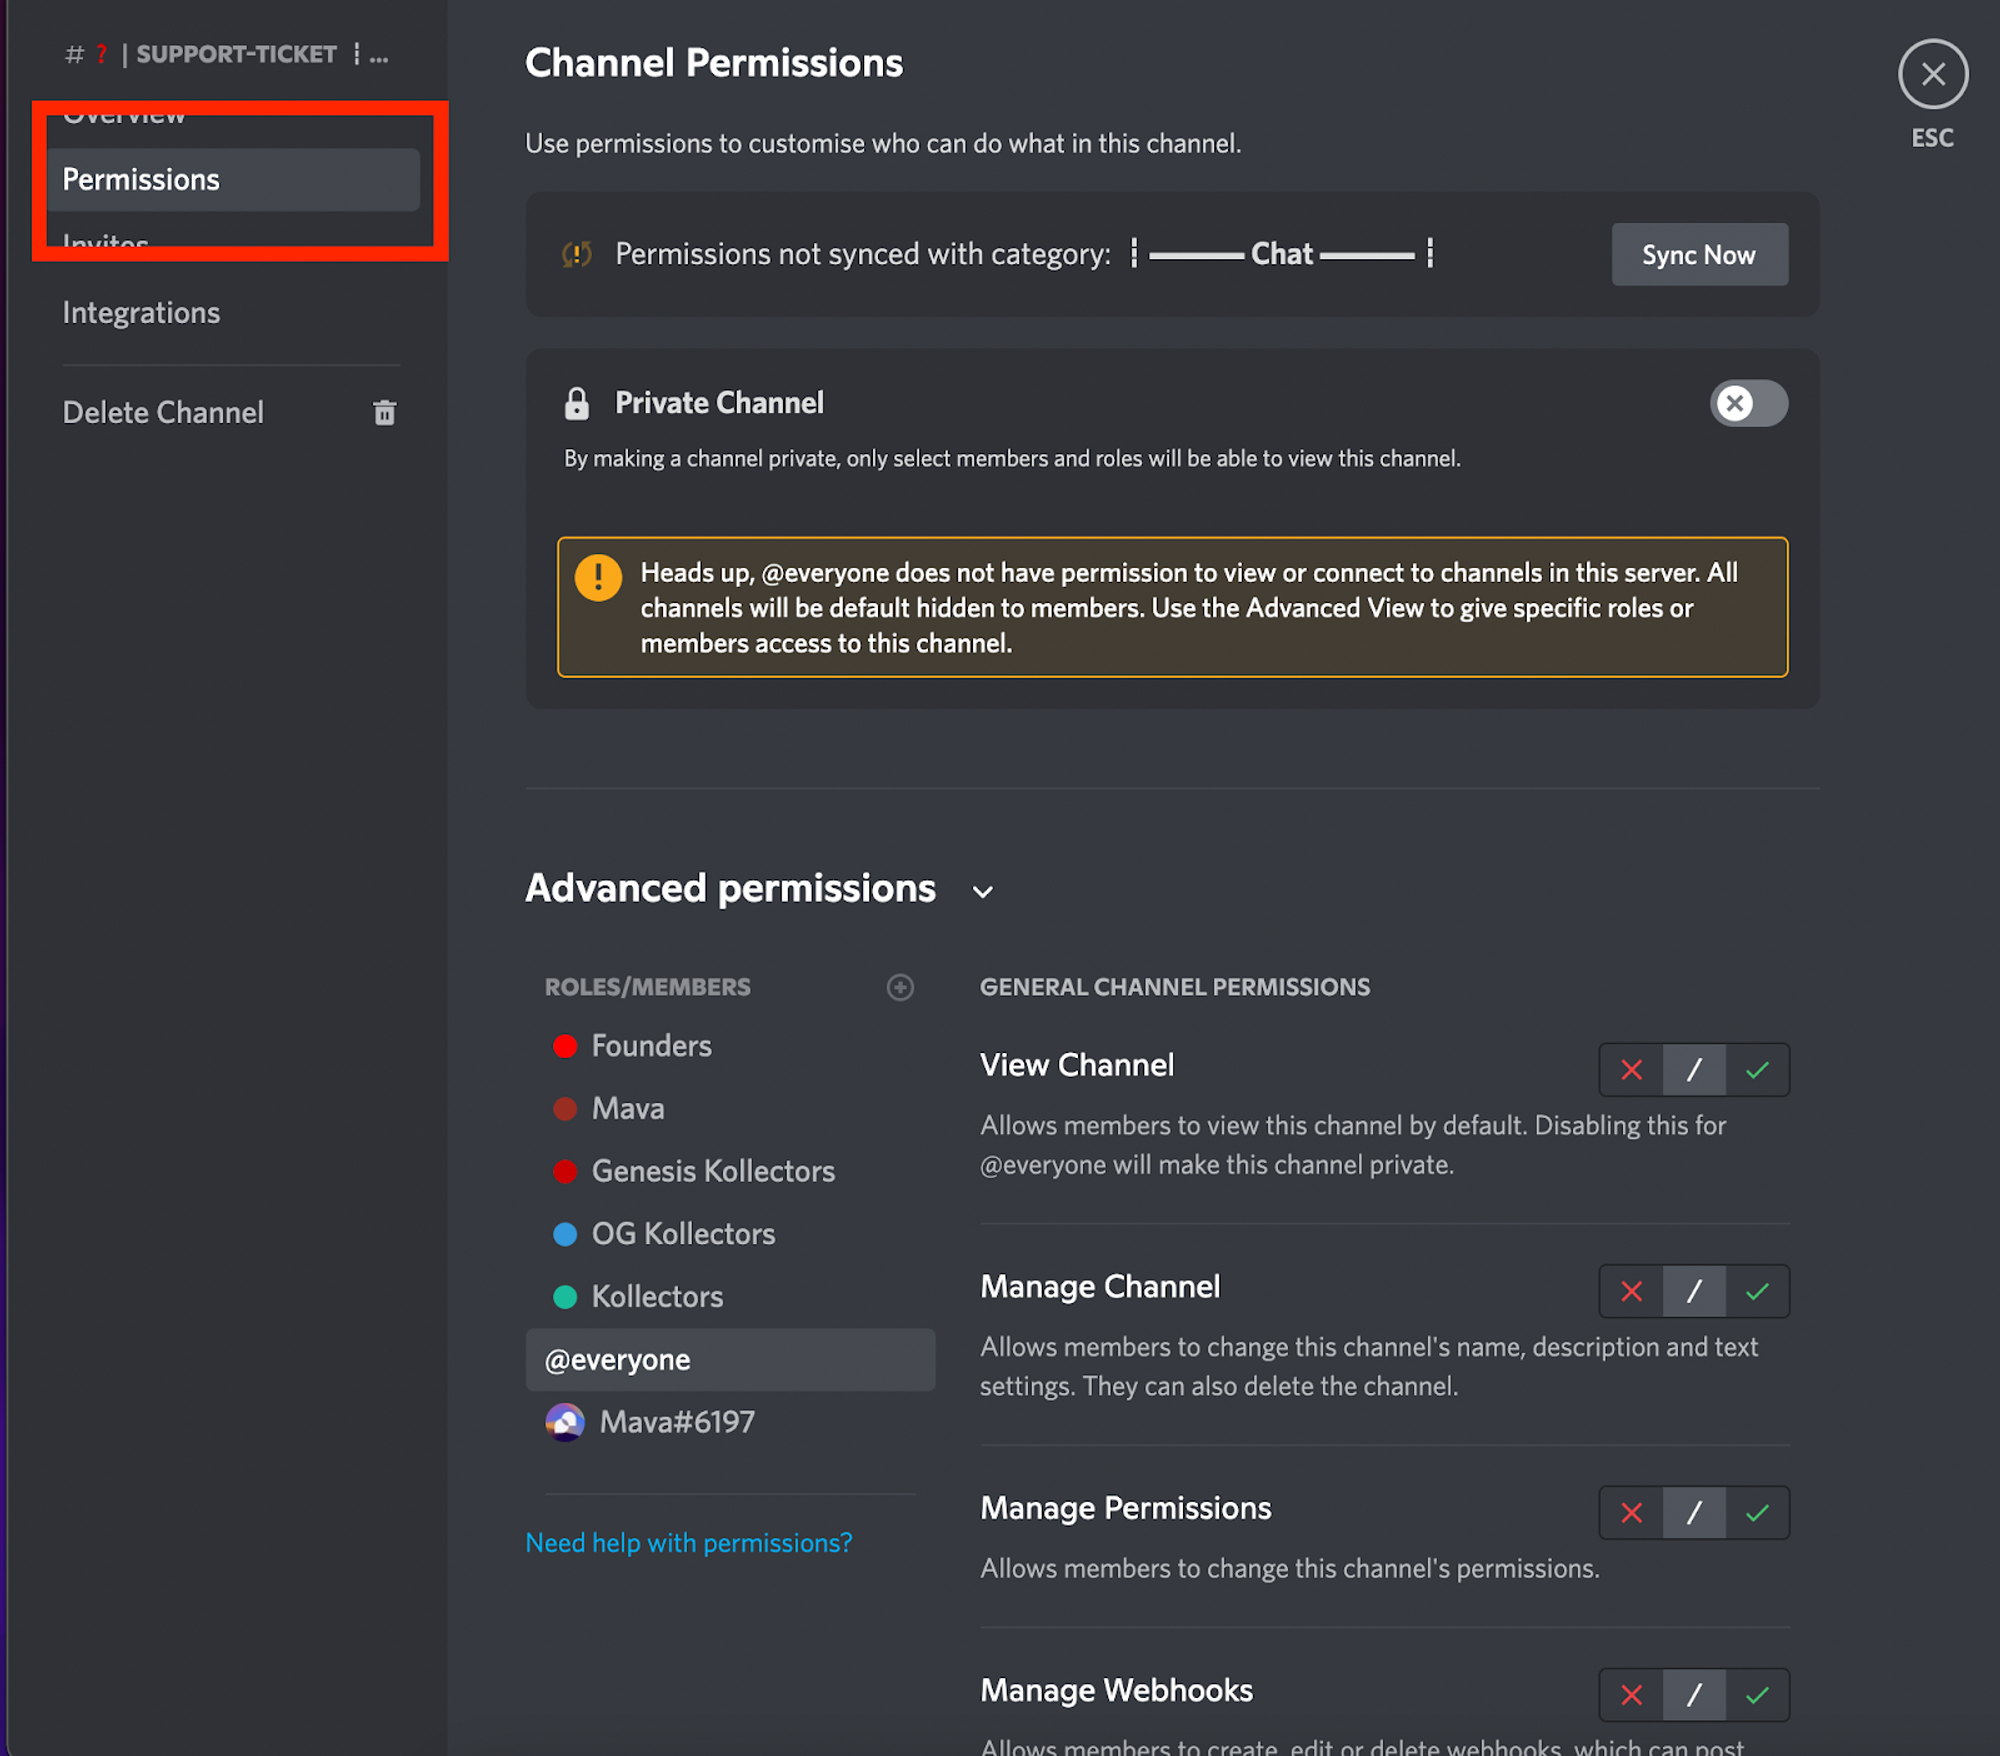
Find the Mava bot from in the ‘Roles/Members’ section and click on it. If you don’t see the Mava role, you will need to search for it manually.
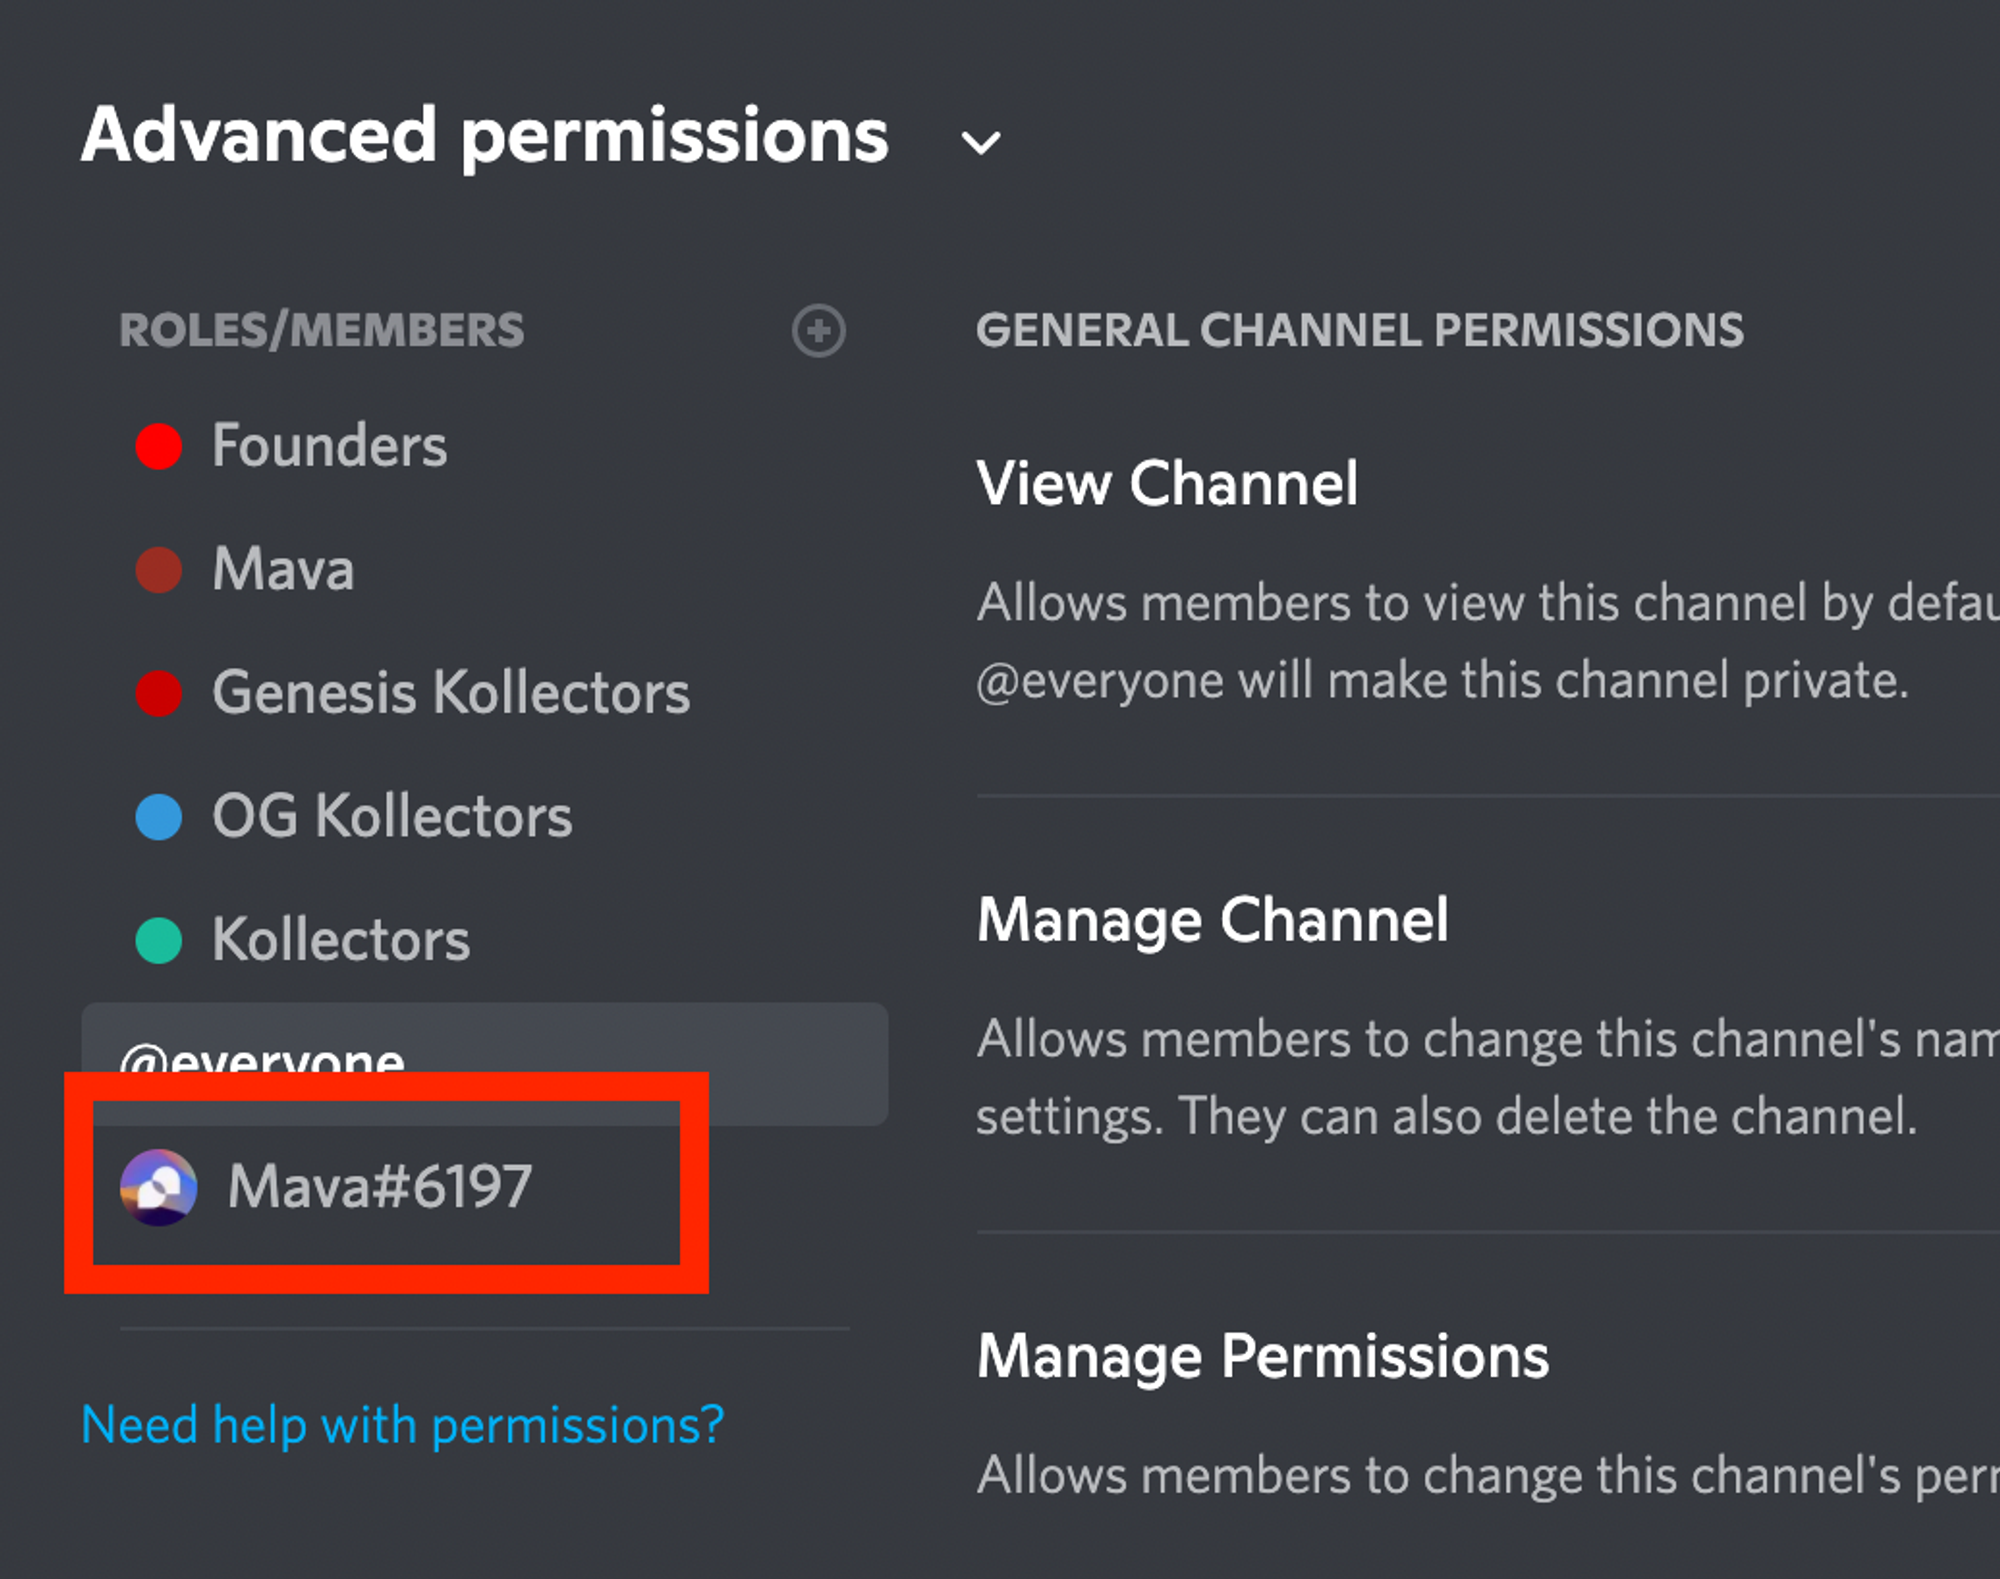
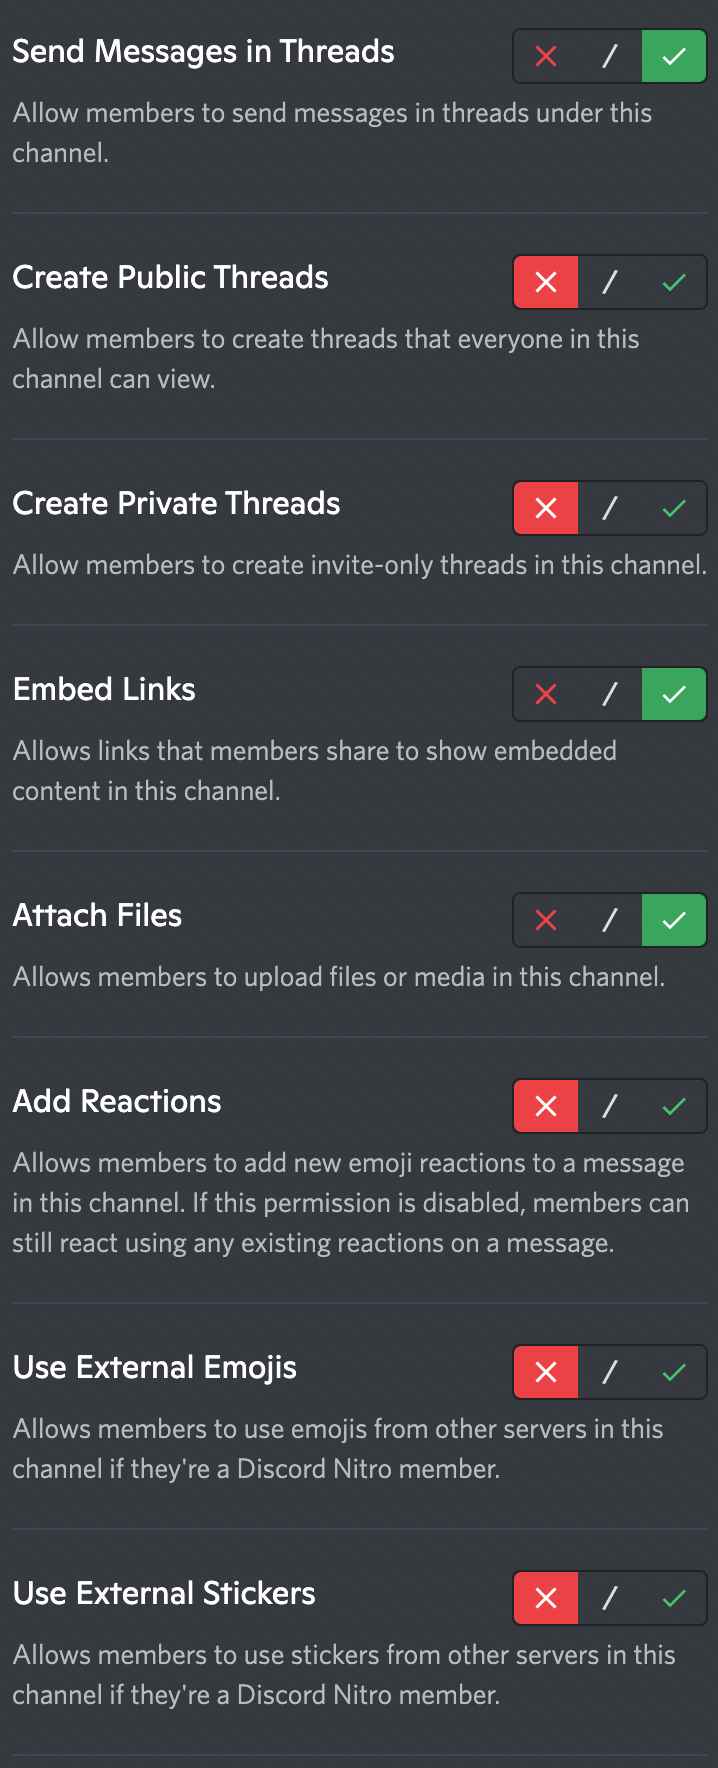
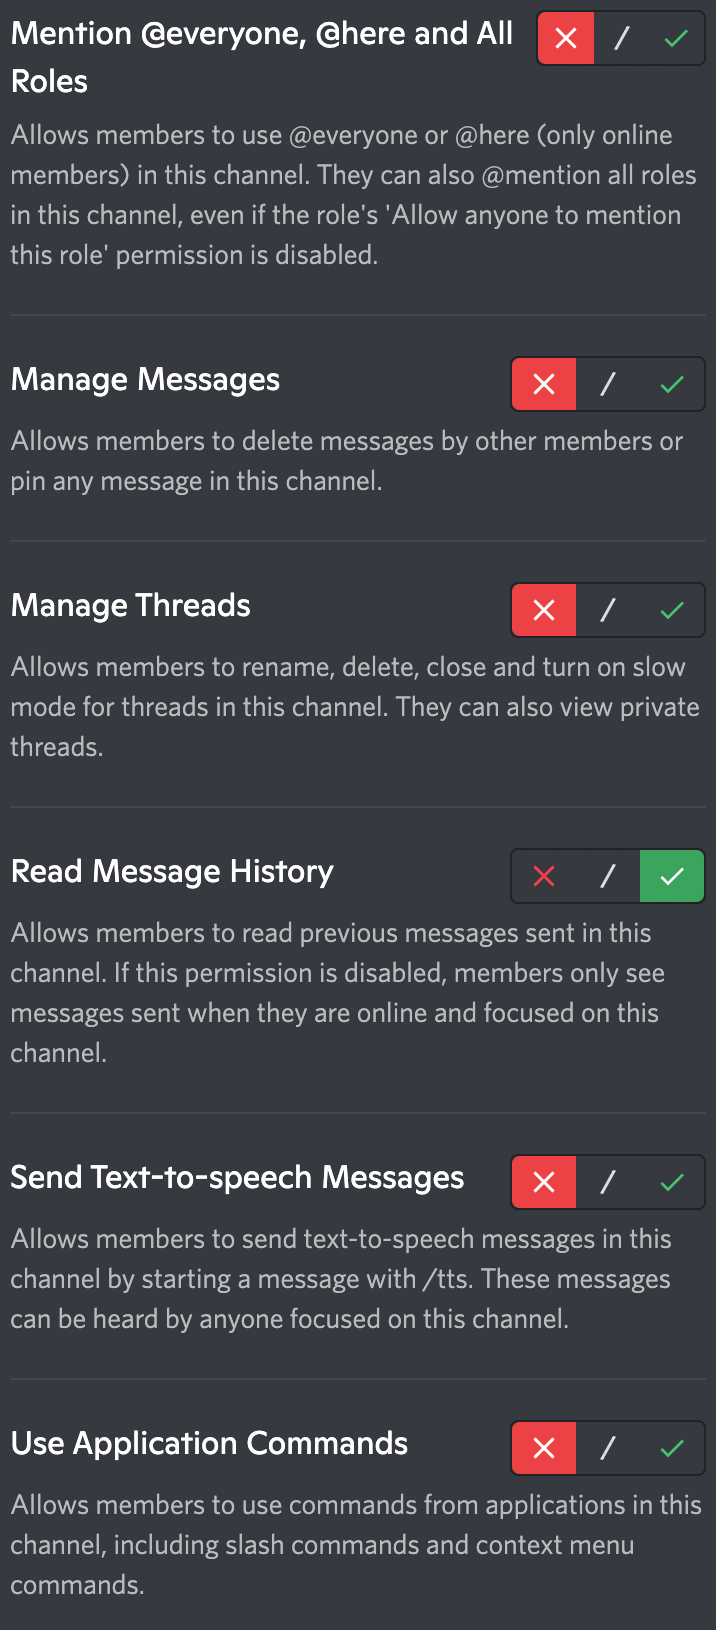
Once you have clicked on the ‘Mava’ Member you will be able to update the Permissions, under the ‘General Channel Permissions’ header. Press the green tick for the following permissions and save your changes.
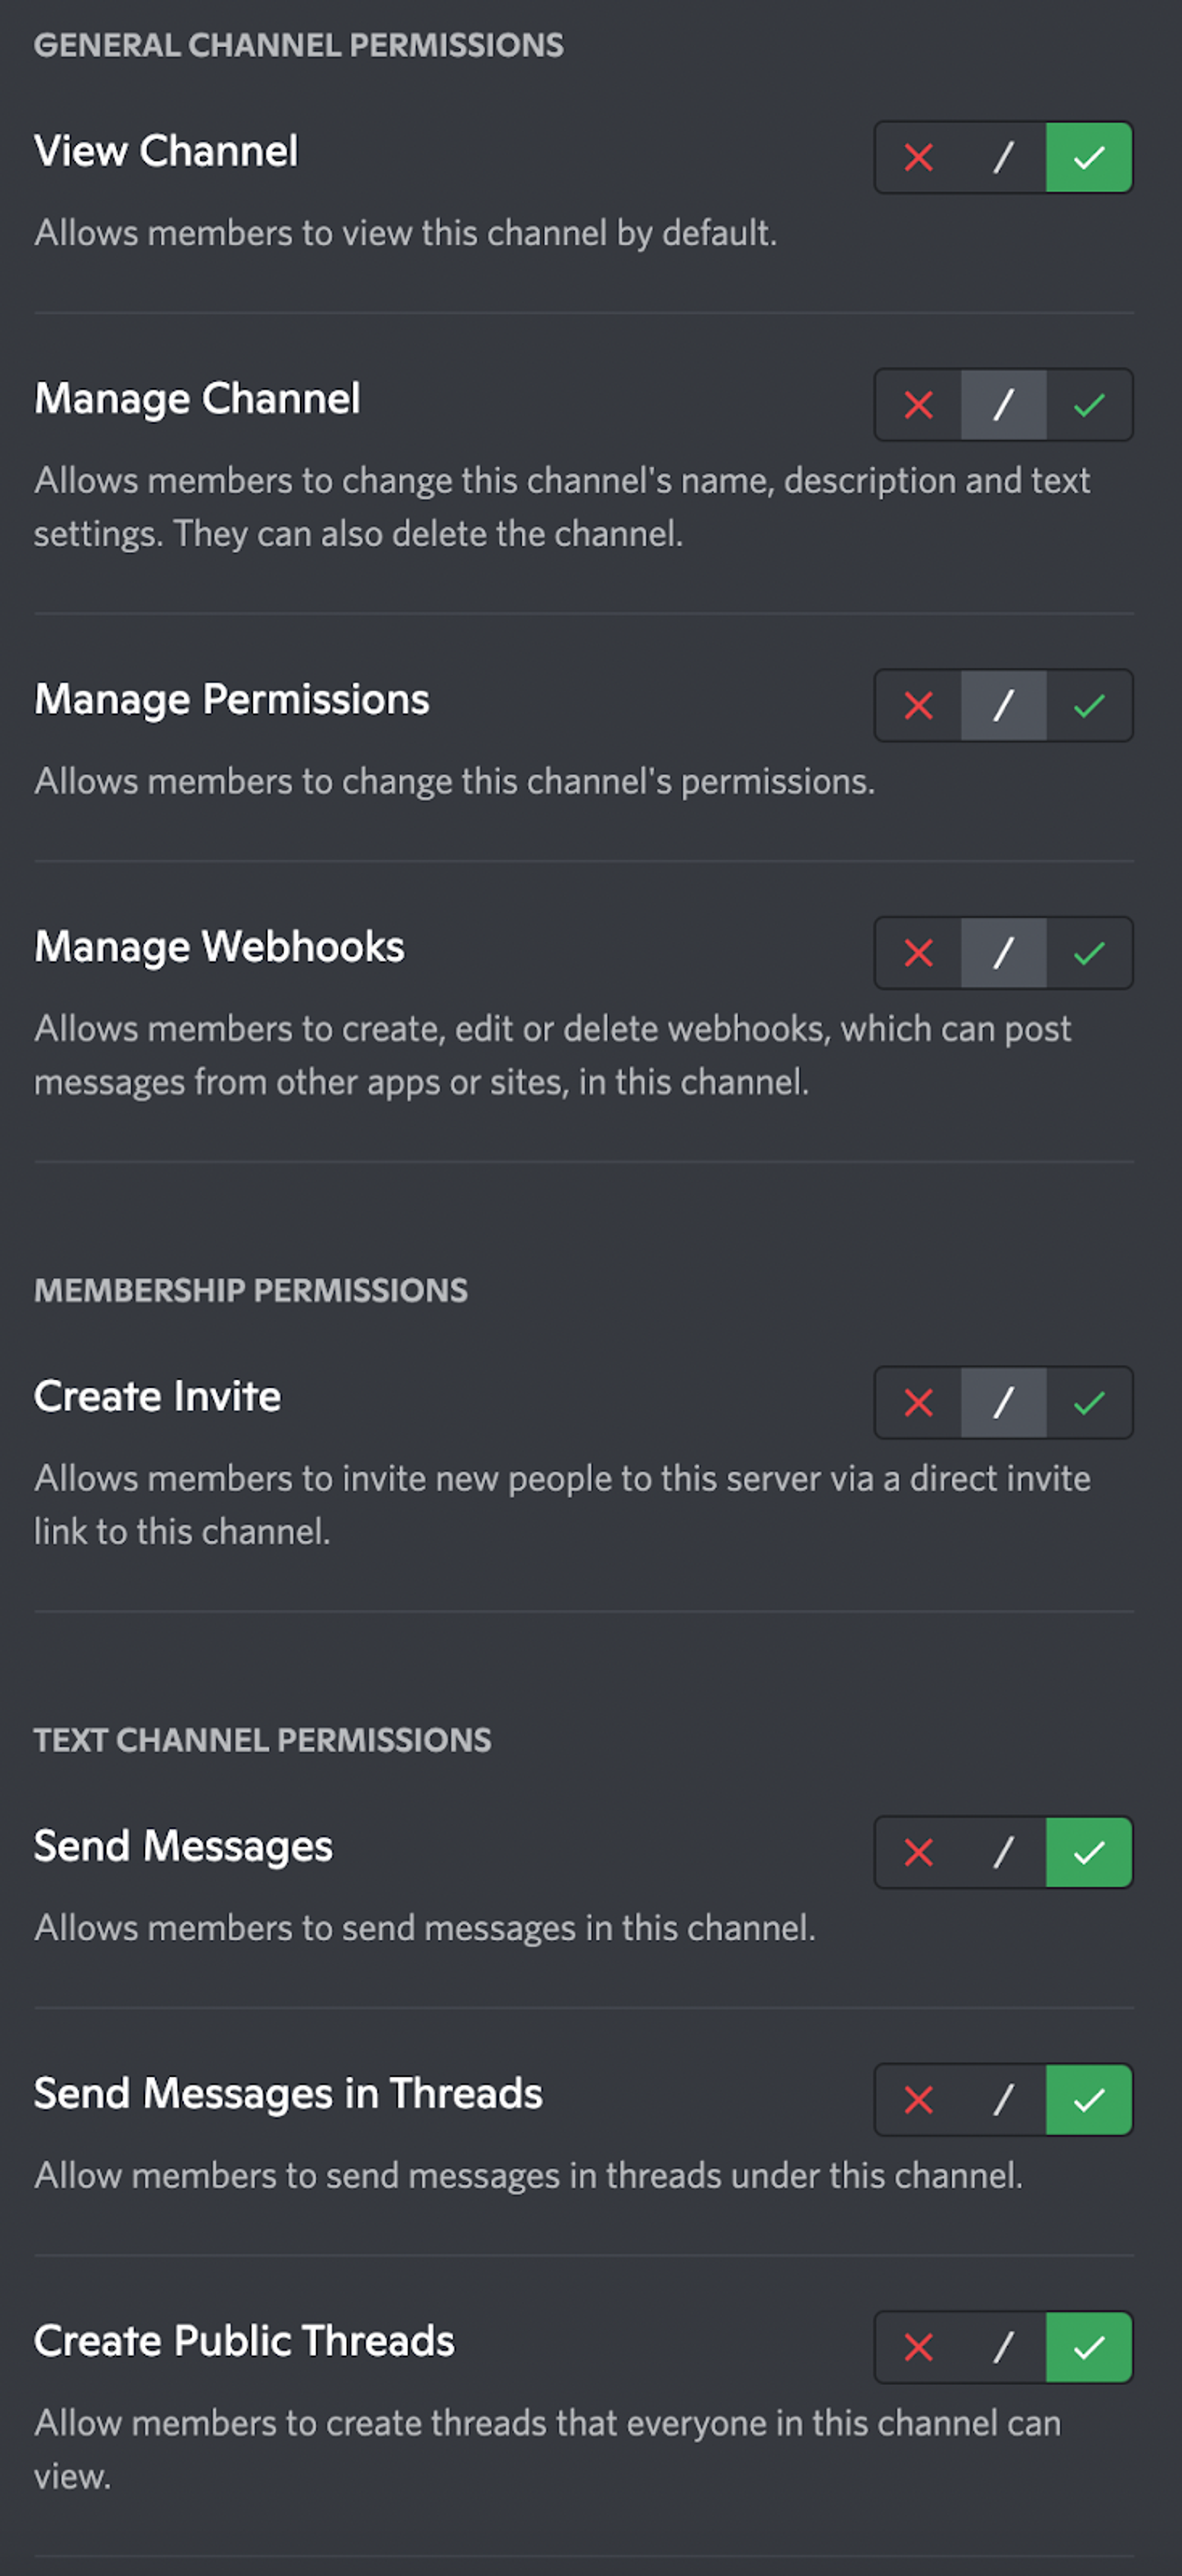
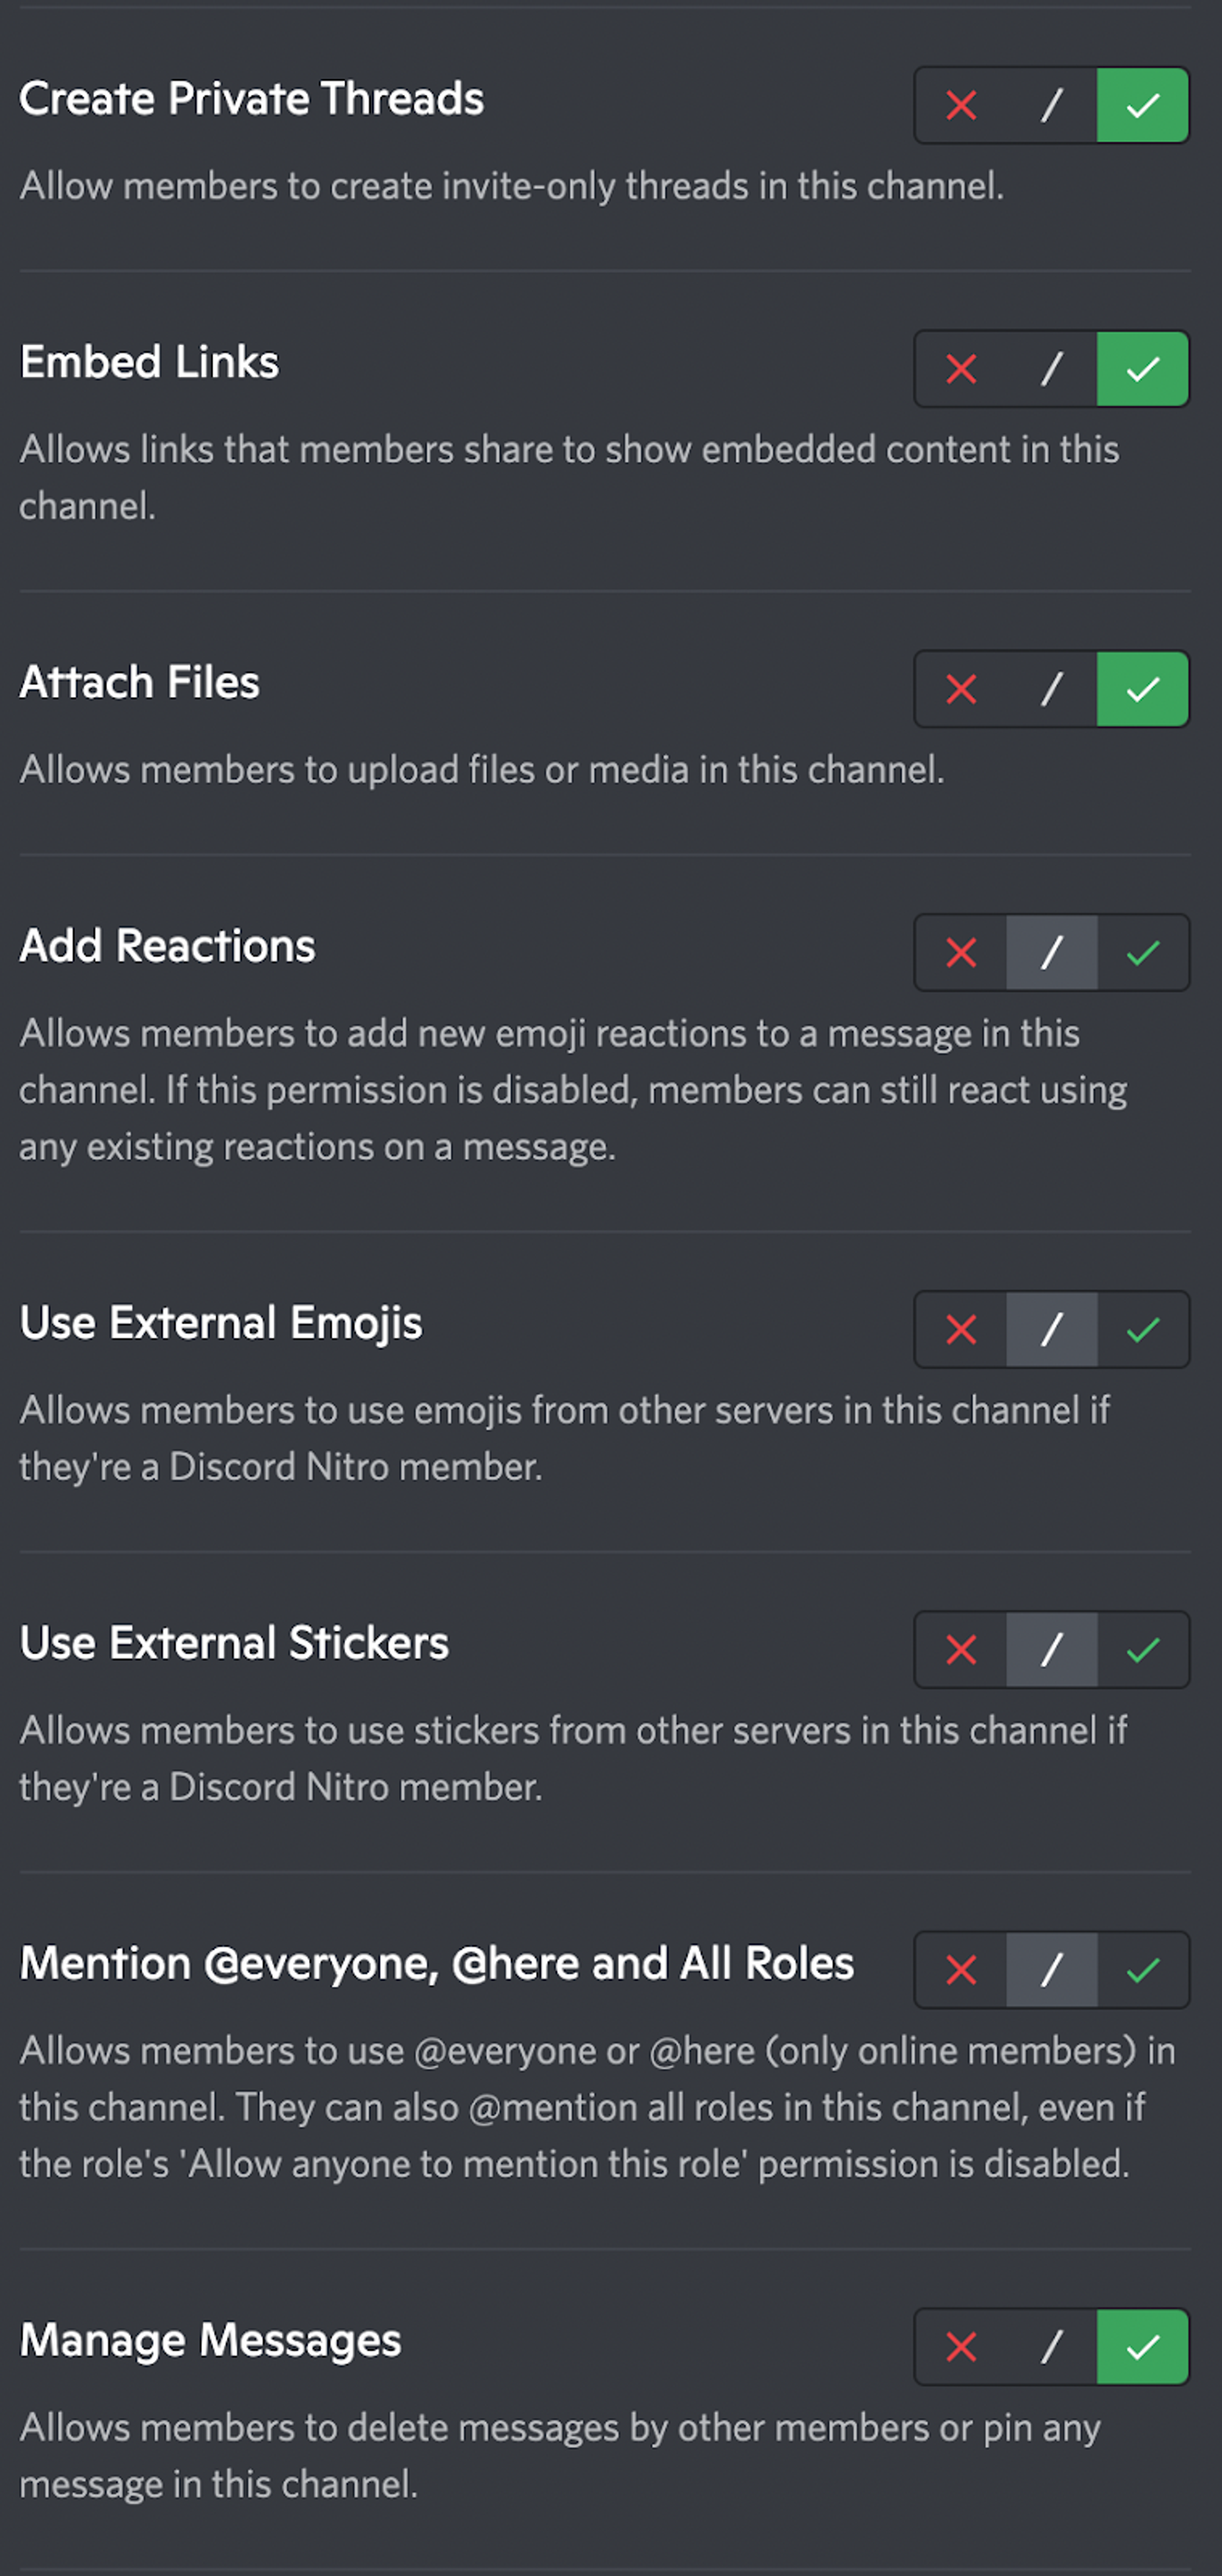
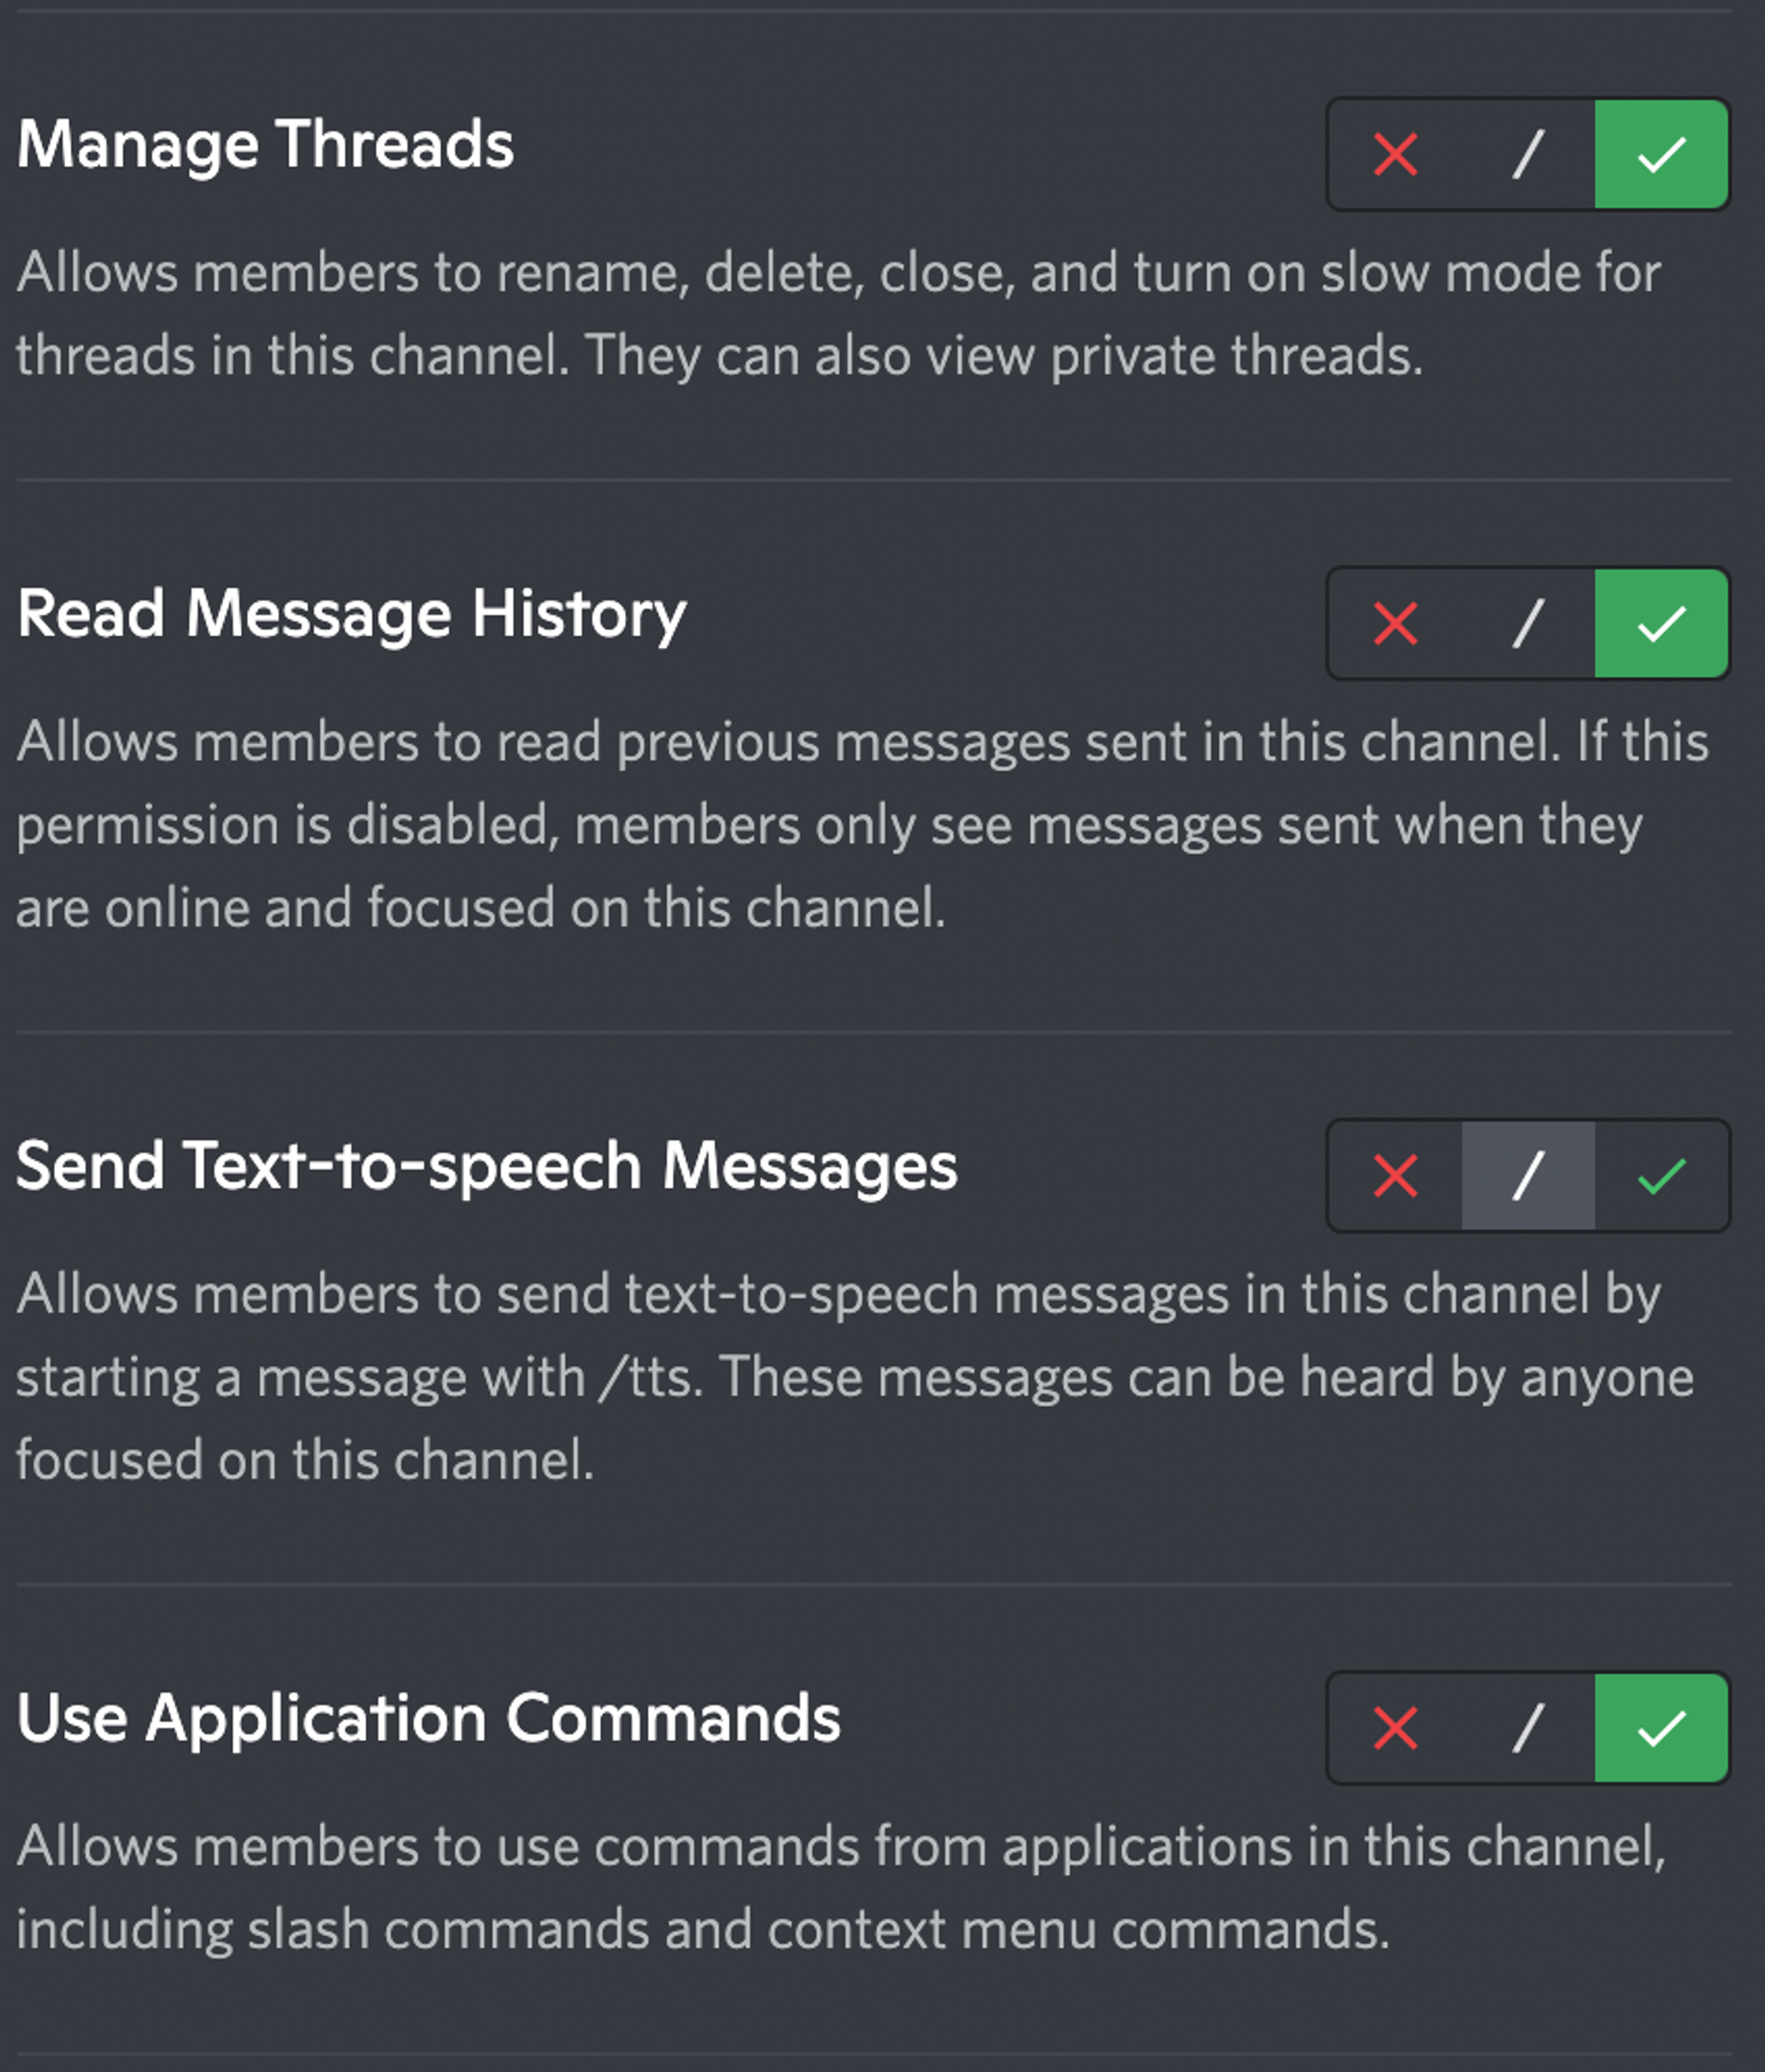
To make sure your users are able to interact with private threads properly, including allowing them to share screenshots, you will need to update settings for each of the roles within your sever. Just like you did with the Mava bot, you now need to add any roles into the channel that you want to be able to use the bot.
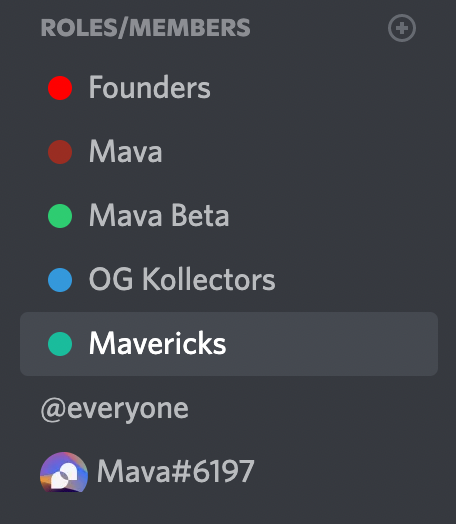
For users that you want to be able to open tickets (usually each role apart from @everyone) you need to update the permissions as follows. Make sure the "Send Messages in Threads" permission is turned on, otherwise users won't be able to type in the ticket.
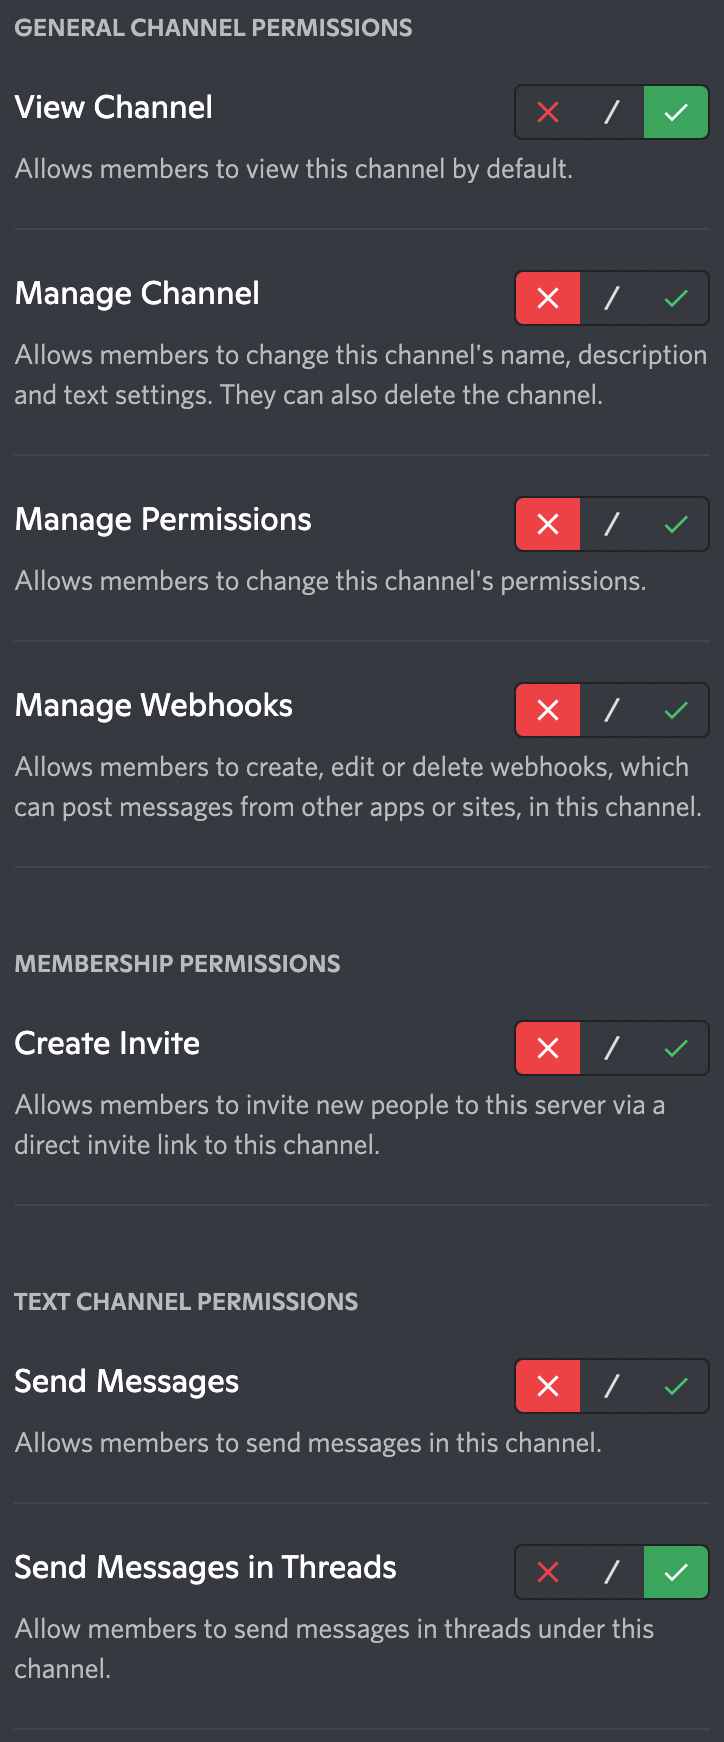
Go back to the Mava dashboard and press the ‘Check Permissions’ button.
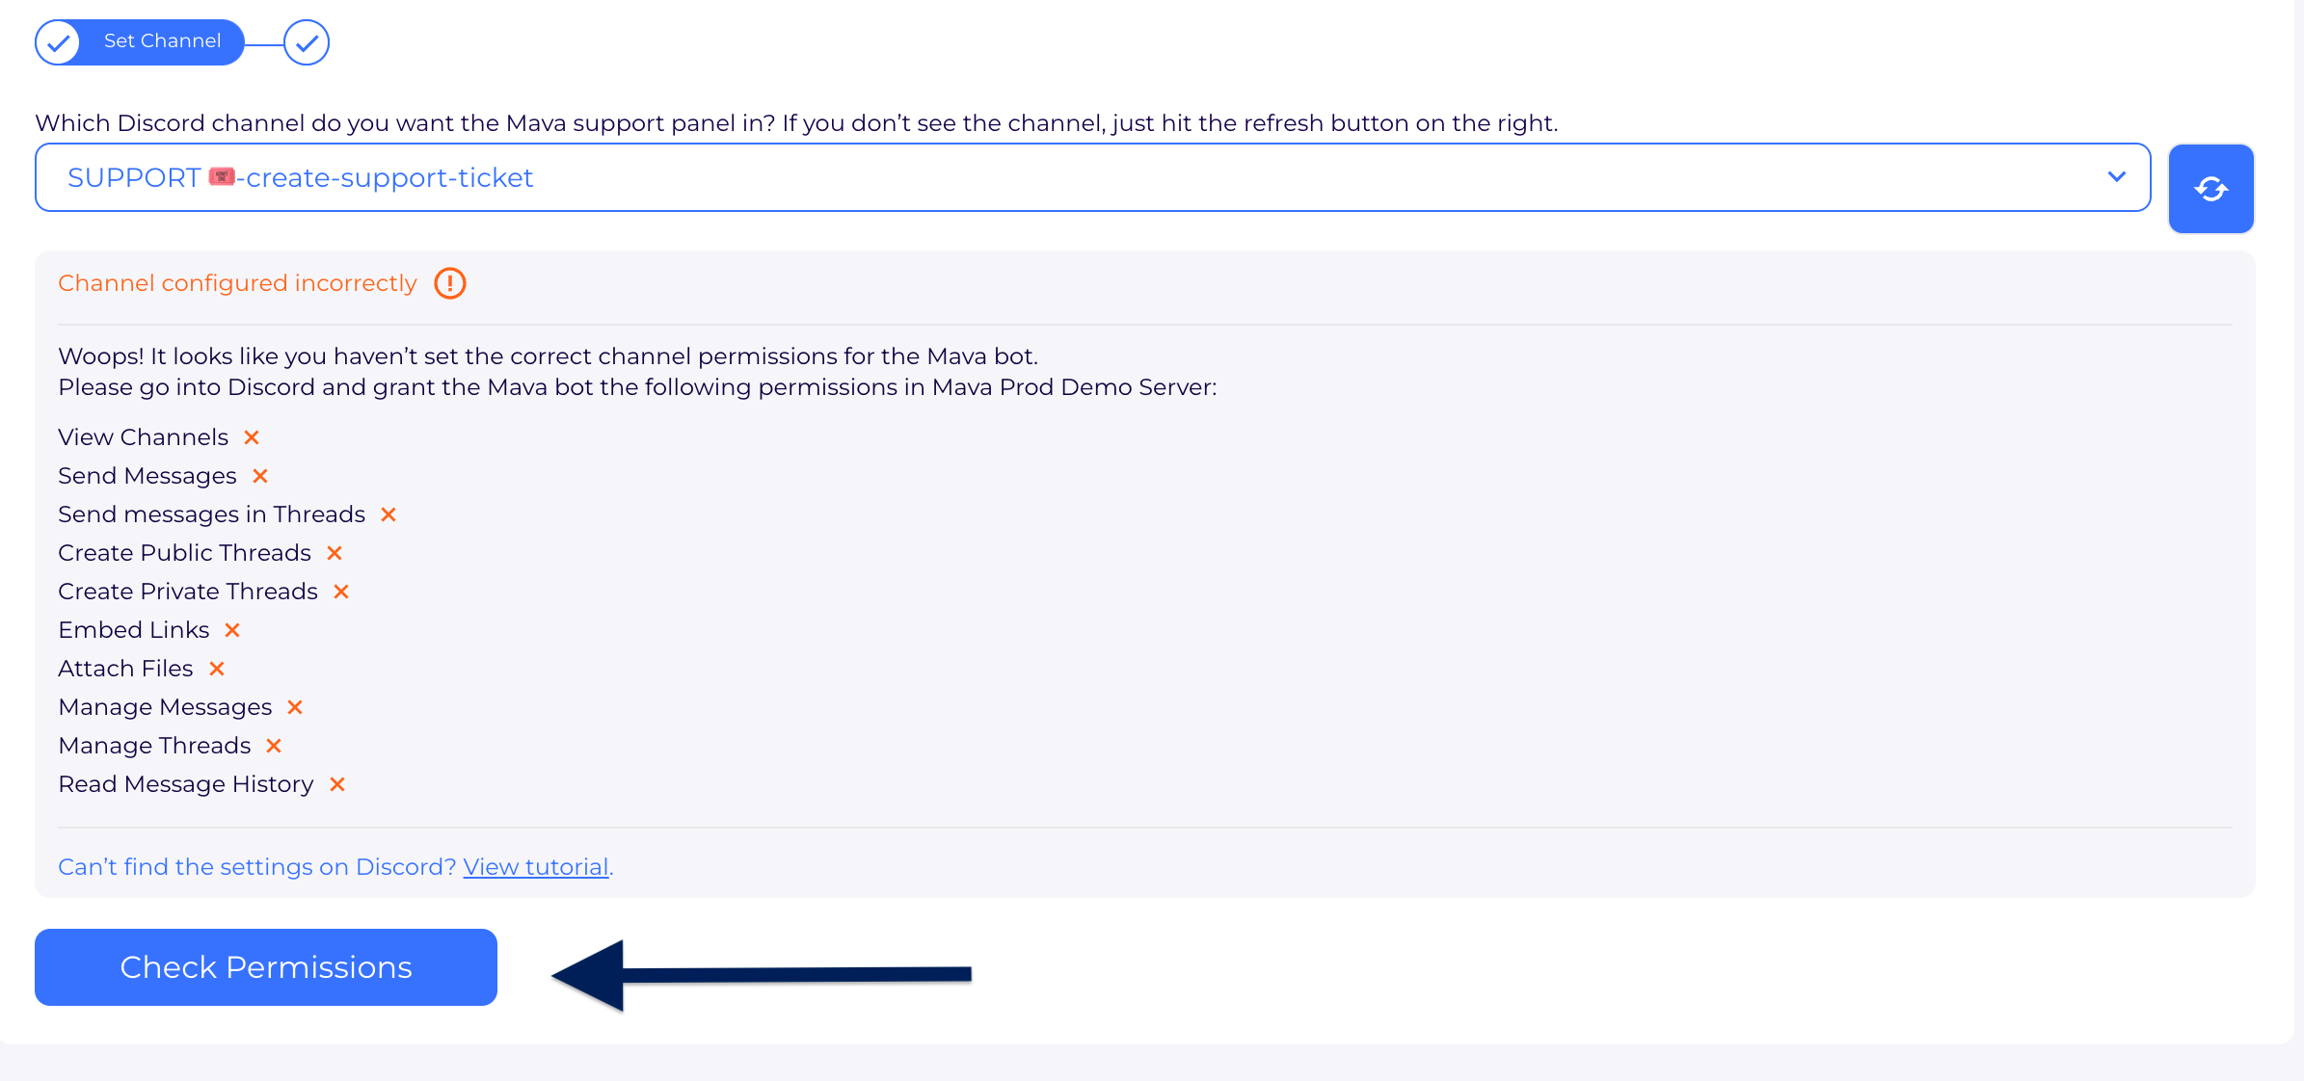
You'll see a confirmation message if the channel permissions are set correctly

Step 5: Customize your ticket panel
This panel will be visible to users within your ticket channel and will be how they create a ticket in your Discord server. You can either update the text now or come back later to customize your ticket panel.
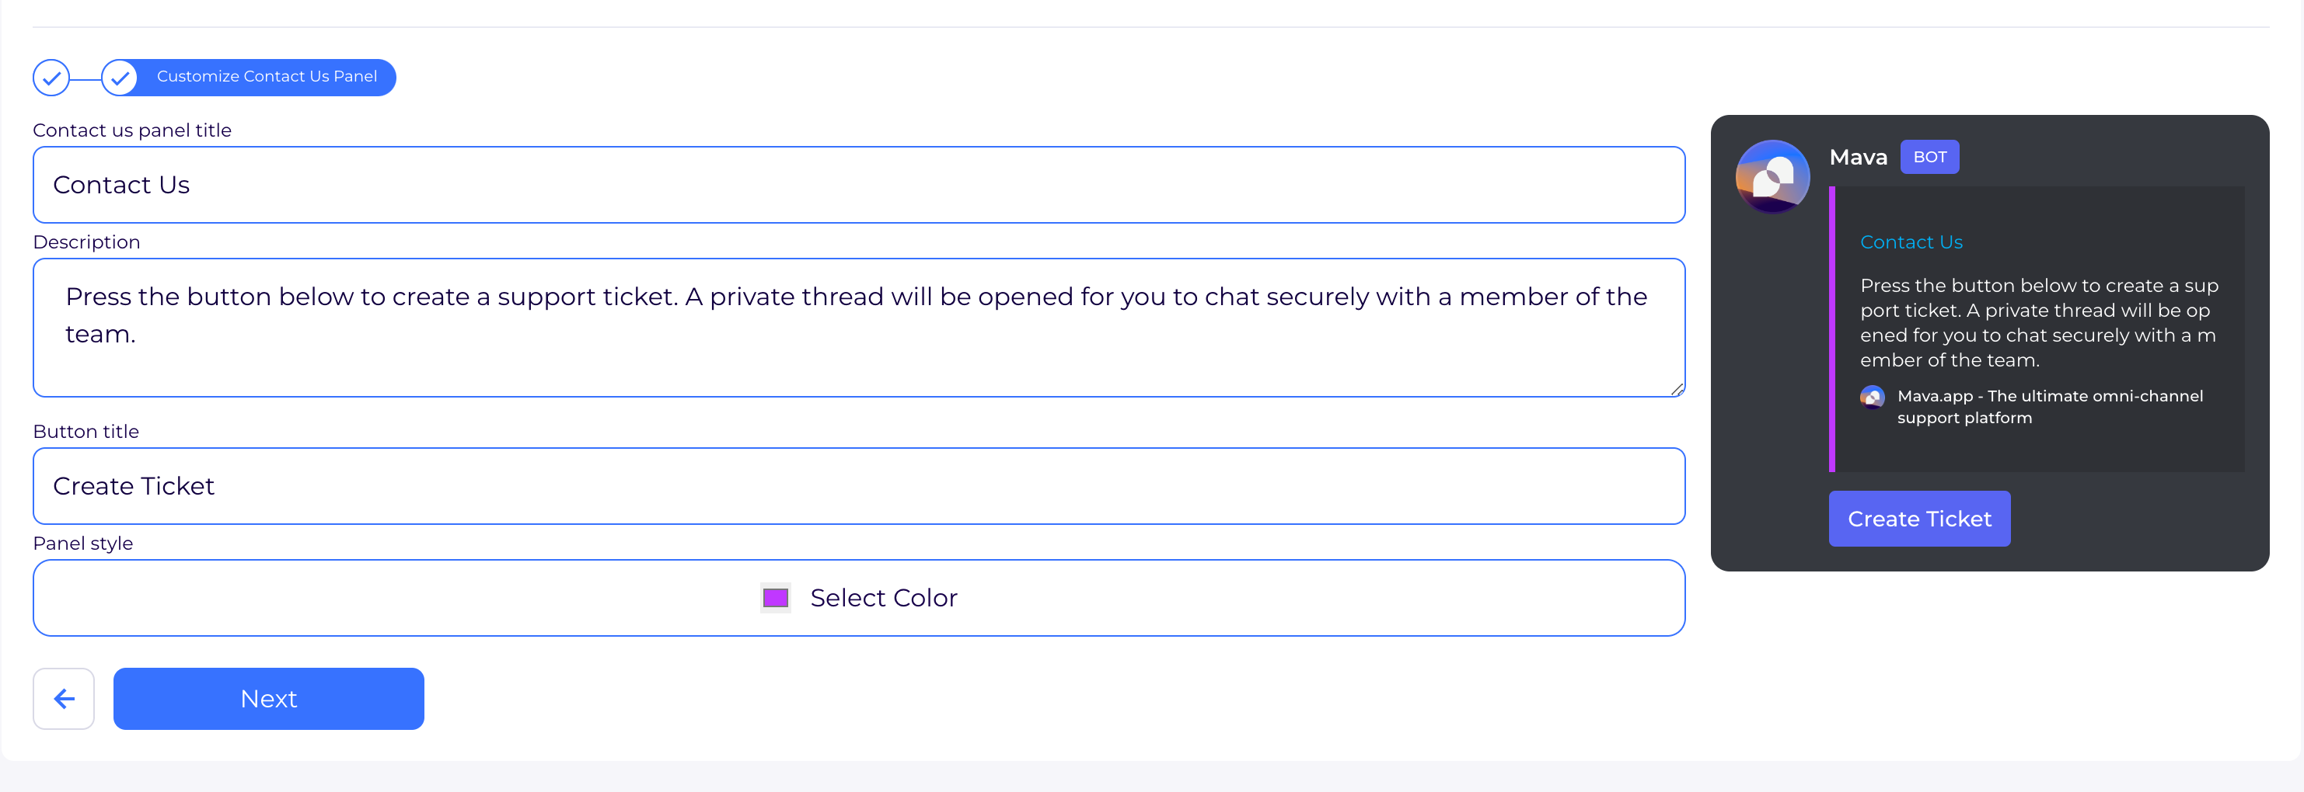
Step 6: Send ticket panel to Discord
To complete the setup and send the ticket panel to your Discord channel, press the Next button
Step 7: Create a test ticket
Go back into your Discord and press the 'Create Ticket' button

If you're set your permissions correctly, this will open a new ticket as a private thread within Discord
You'll see your username under the channel list on left hand side after the thread has opened.

You can now type in the ticket, press buttons from your Chatbot builder or close out the ticket
Last updated